Applies one or more labels to selected attachments. Existing labels on those attachments are preserved.
When to use: Tagging uploaded files with a project or category label; applying baseline labels to all attachments on a page.
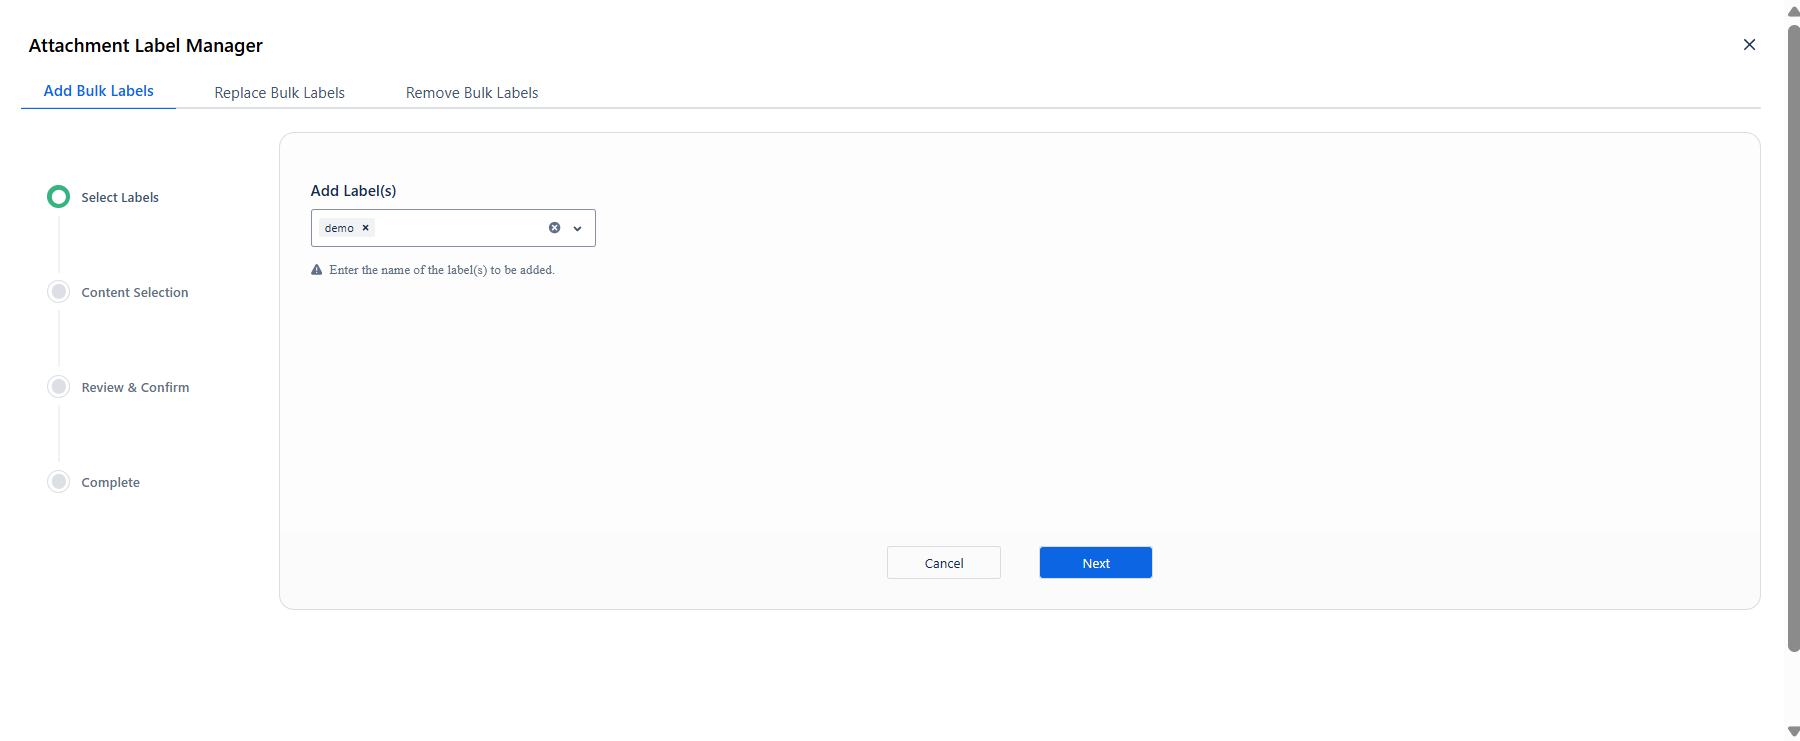
Step 1 - Select Labels
Type the label name(s) in the Add Label(s) field and press Enter to confirm each one. They appear as removable tags inside the field.
Click Next to continue.
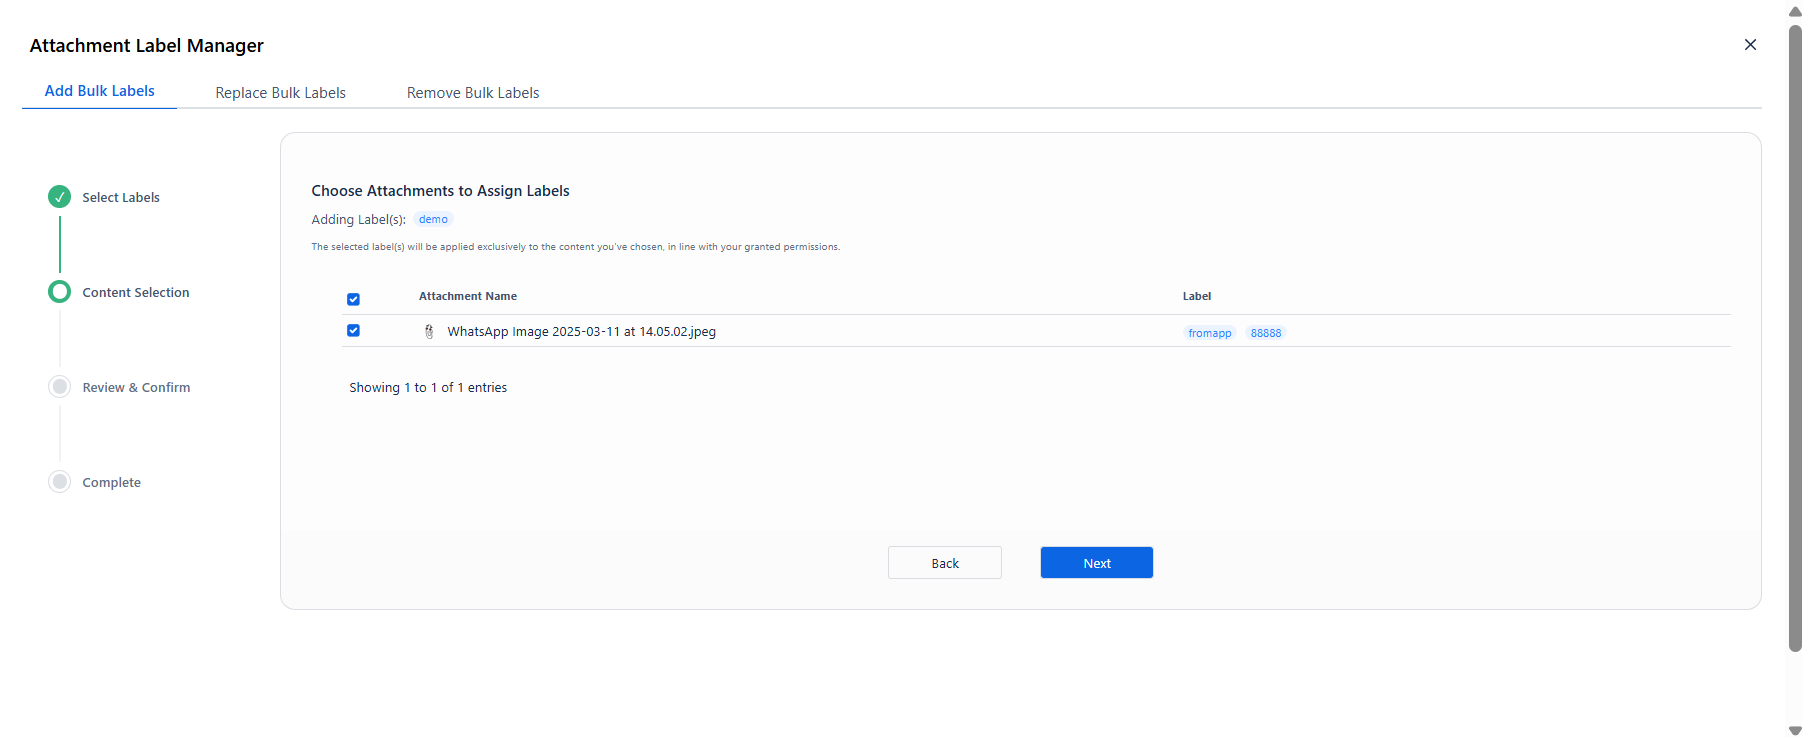
Step 2 - Attachment Selection
A table lists every attachment on the current page. Each row shows the Attachment Name and its existing labels, so you can see the current state before making changes.
Check the box next to each attachment you want to label. Use the header checkbox to select all at once.
The Next button remains inactive until at least one attachment is checked.
Click Next when your selection is ready.
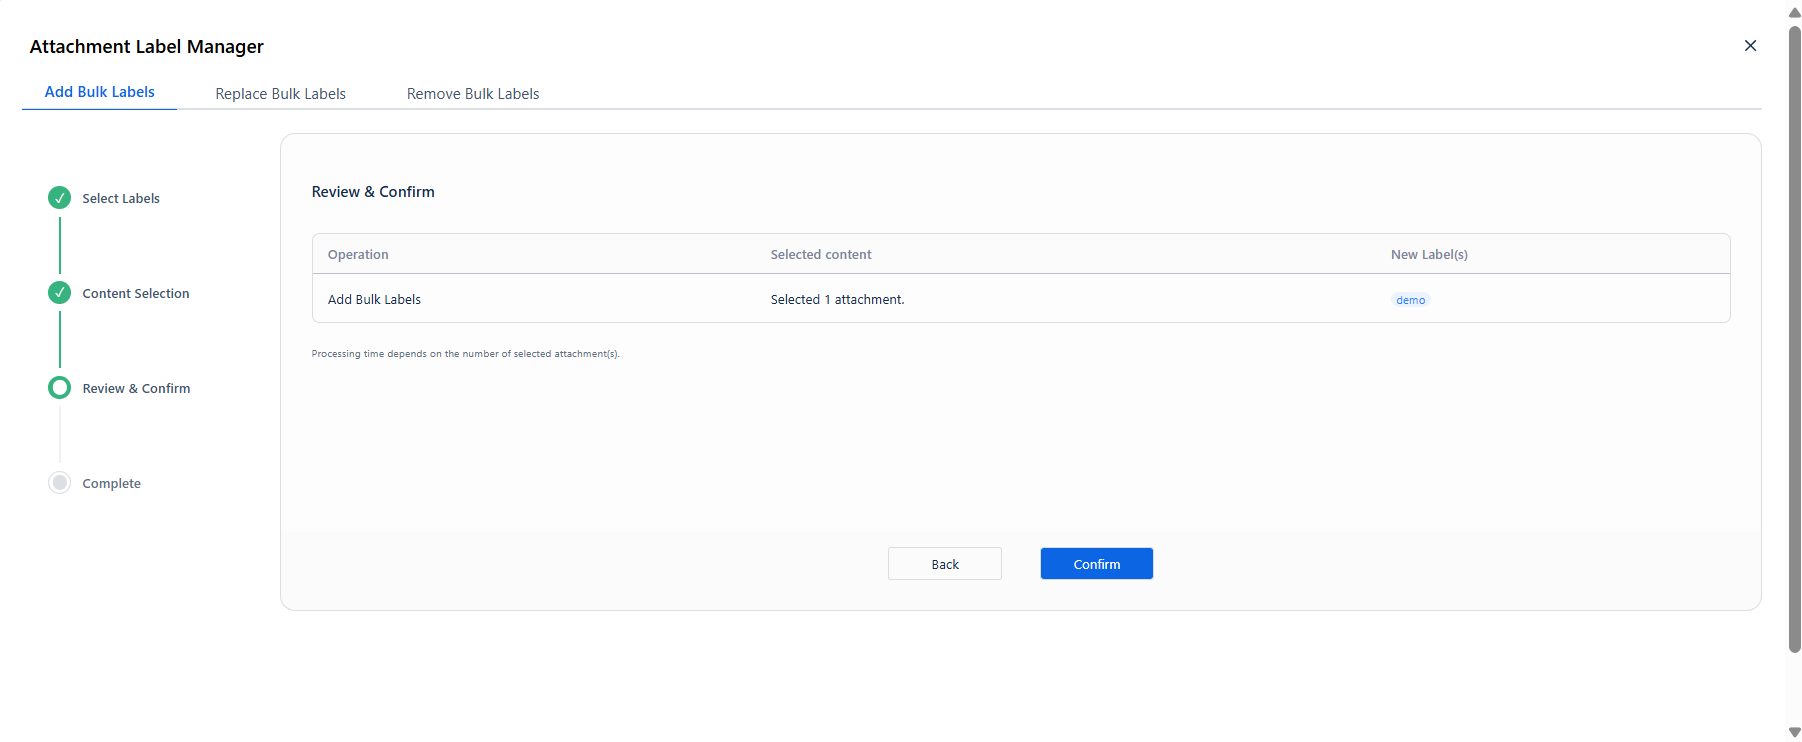
Step 3 - Review & Confirm
|
Column |
What it shows |
|---|---|
|
Operation |
Add Bulk Labels |
|
Selected content |
Number of attachments in scope |
|
New Label(s) |
The label(s) that will be applied |
Click Confirm to start the operation.
Step 4 - Processing & Results
A progress bar appears while the operation runs. The panel shows:
-
Operation Type: add
-
Attachment(s) to Process: total attachments being updated
-
Operation ID: a unique reference for this job
-
Content Type: attachment
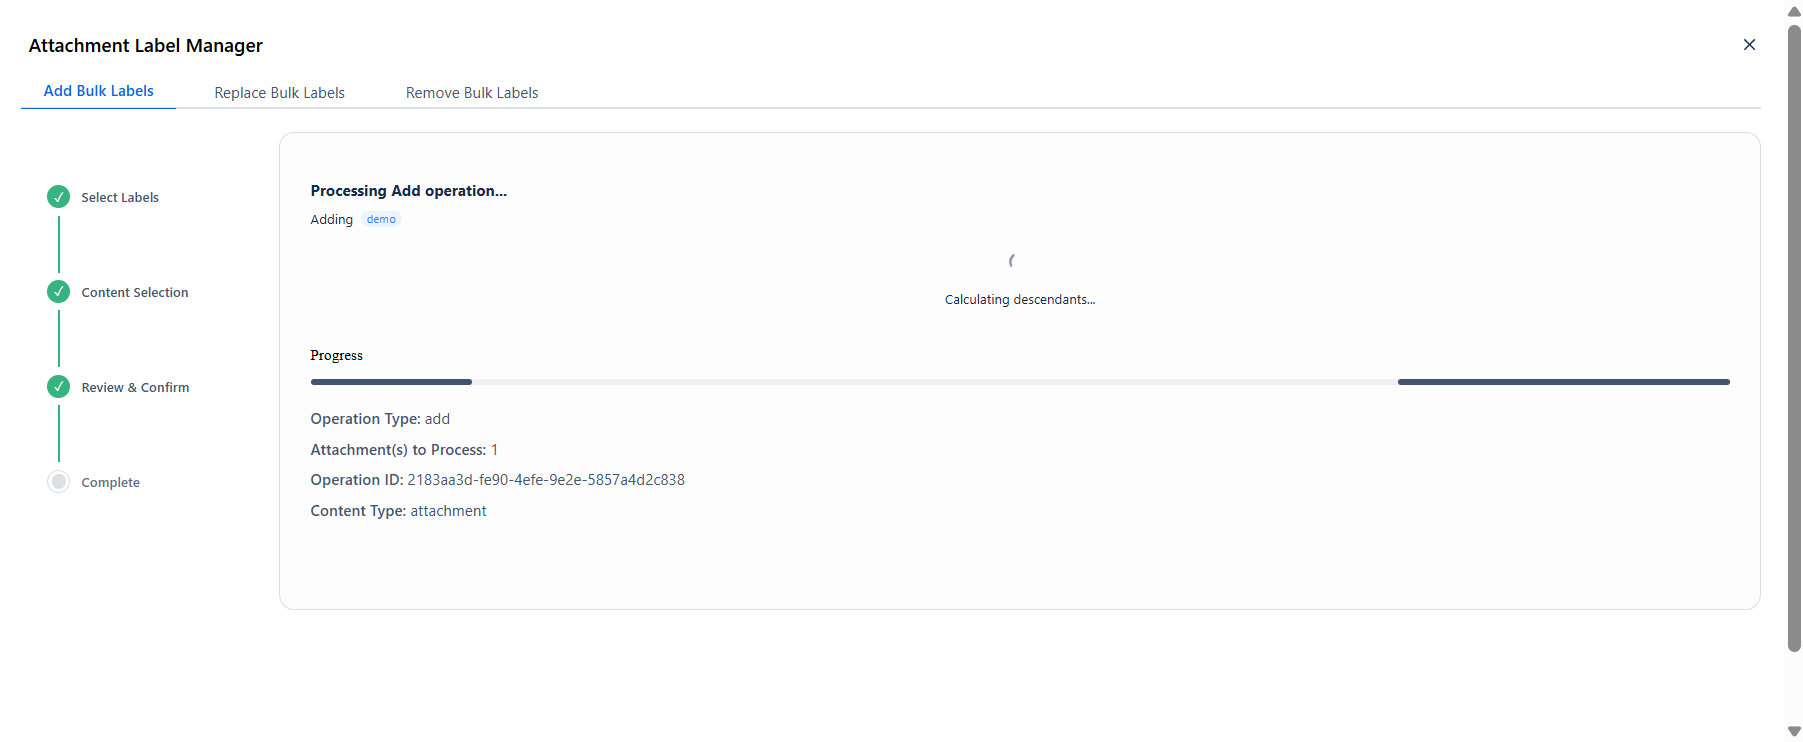
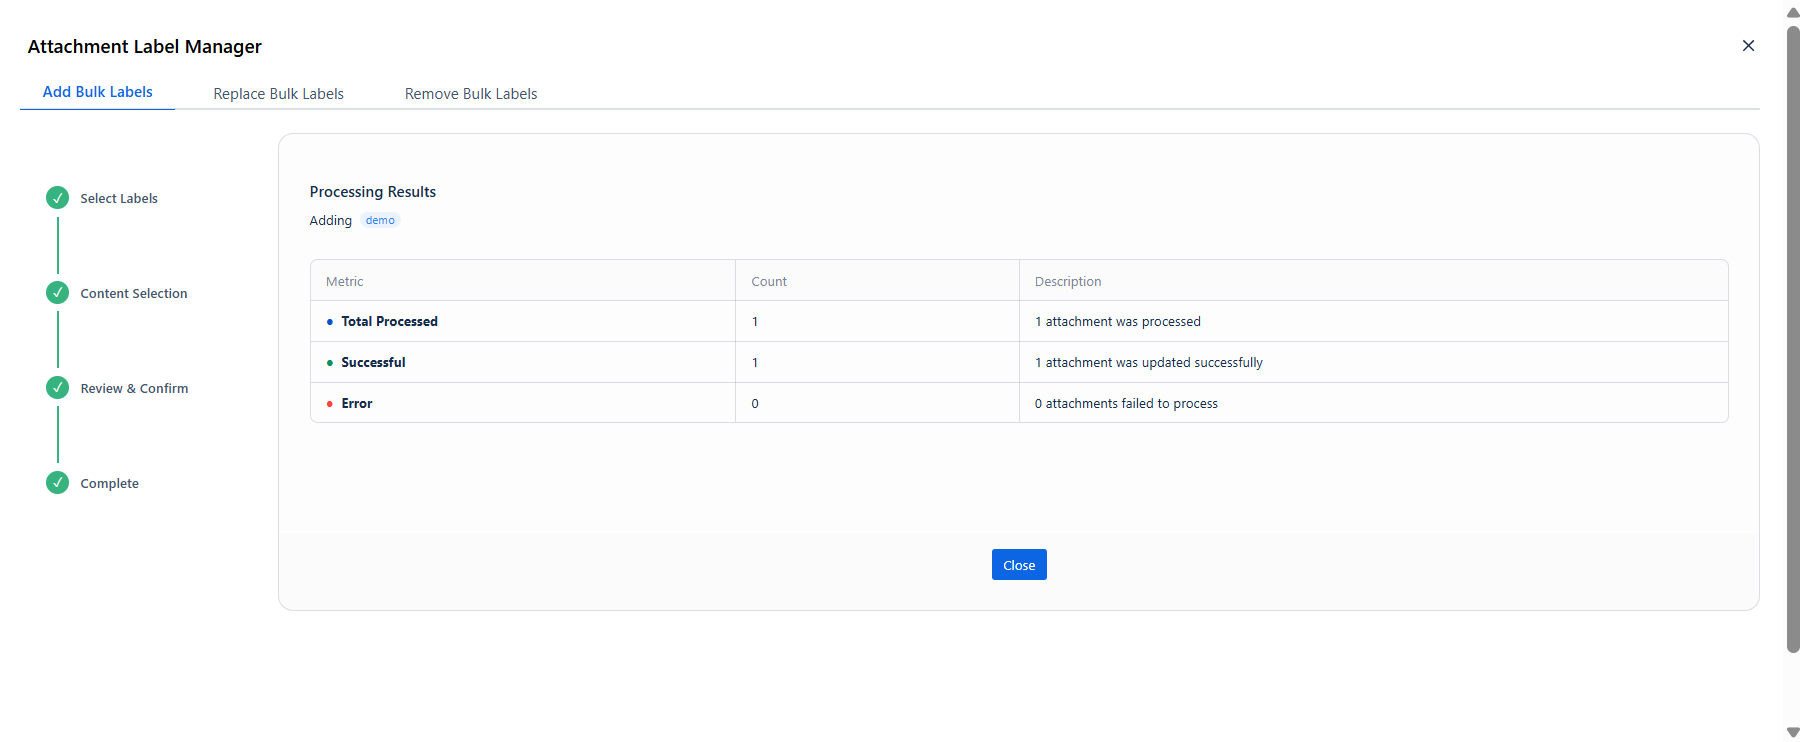
Once complete, the results table appears:
|
Metric |
Description |
|---|---|
|
Total Processed |
Total attachments evaluated |
|
Successful |
Attachments updated without error |
|
Error |
Attachments that could not be updated |
Click Close to dismiss the dialog.