
This guide explains how to update labels in bulk by following a single workflow. You can use the same process to add new labels, replace an existing label with another one, or remove labels that are no longer needed. The only part that changes is where you choose the target content: pages, live docs and blog posts are selected in Page Label Manager, while files are selected in Attachment Label Manager.
6.1 Choose an operation
First, decide what kind of label update you want to make. This choice controls which label fields the app shows in the next step, but it does not change the overall flow. You will still select labels, choose the content, review the summary, and confirm the operation.
|
Operation |
When to use it |
|---|---|
|
Add |
Use Add when the selected pages, live docs, blog posts, or attachments should keep their current labels and receive one or more additional labels. |
|
Replace |
Use Replace to remove an old label from selected content and add a new one, leaving other labels unchanged. |
|
Remove |
Use Remove when selected labels should be deleted from the target items while all other labels remain on those items. |
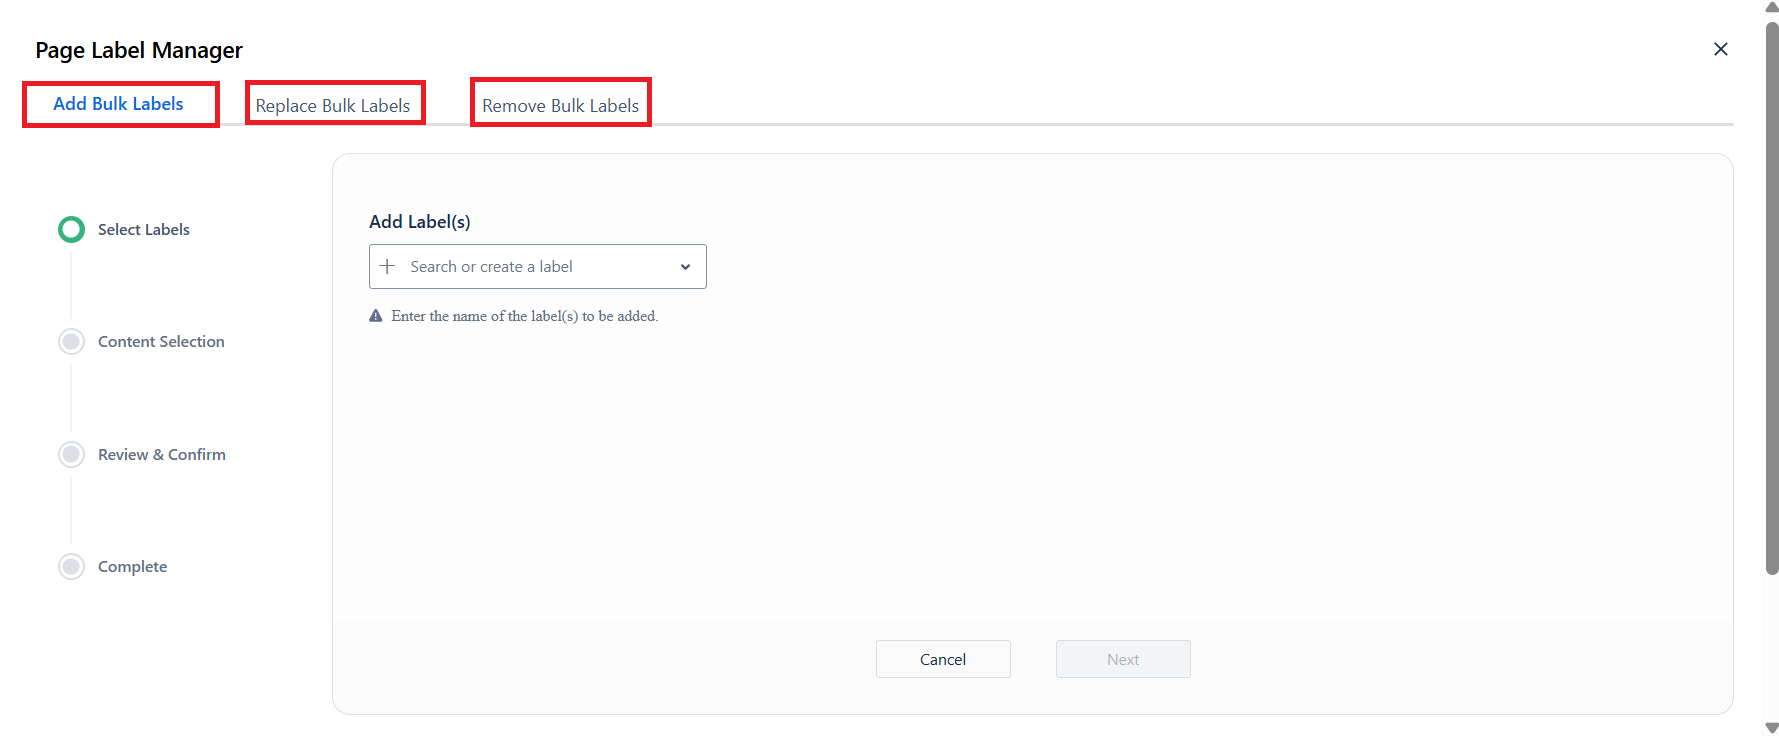
If you are not sure which option to choose, think about the result you expect after the operation finishes: add missing labels, rename or standardize a label, or clean up labels that should no longer be used.
6.2 Select labels
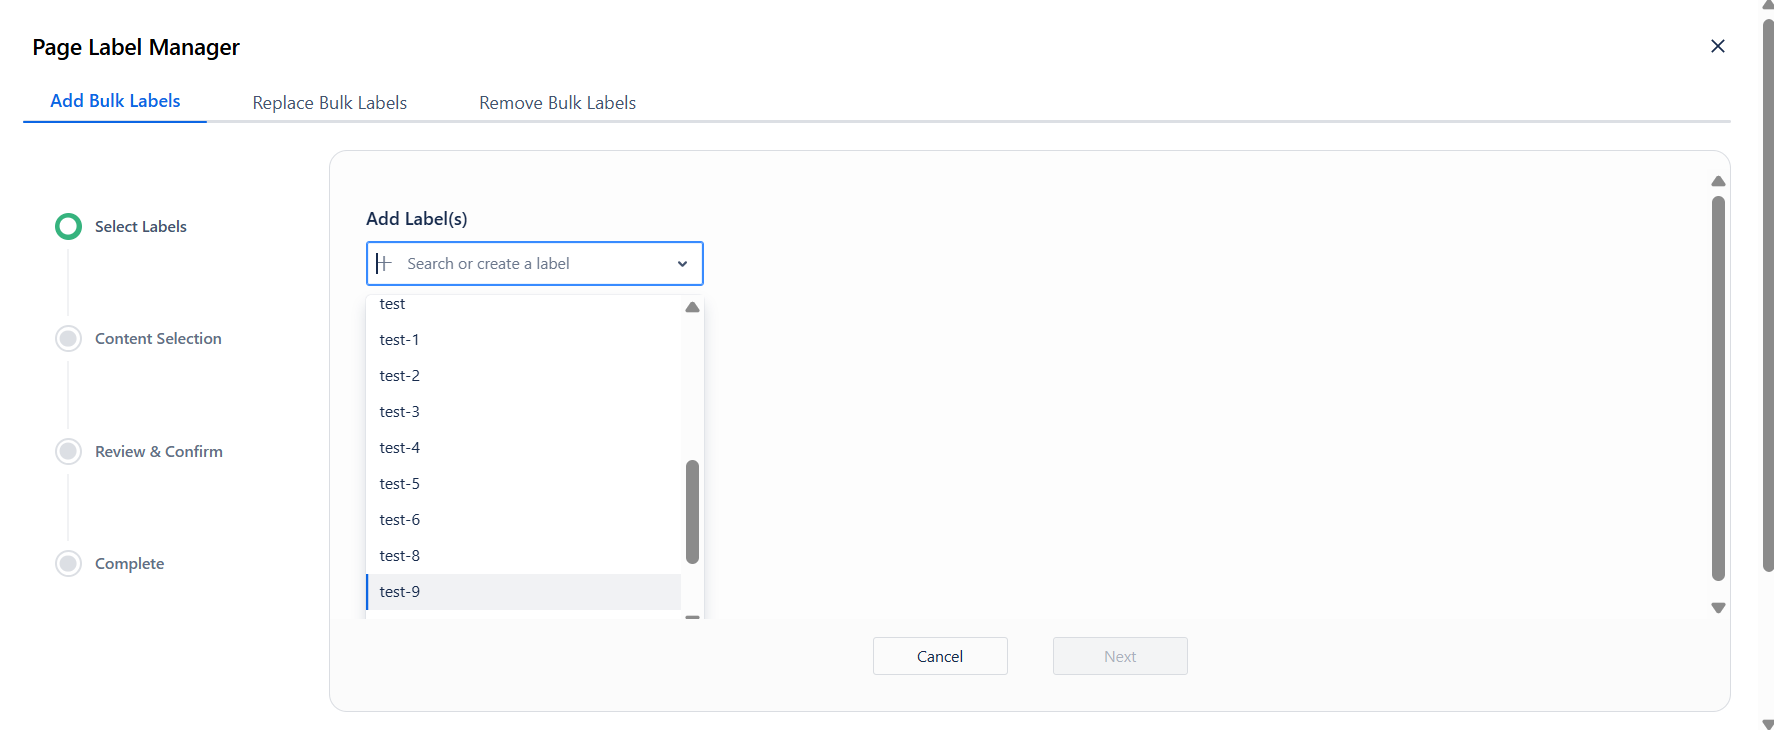
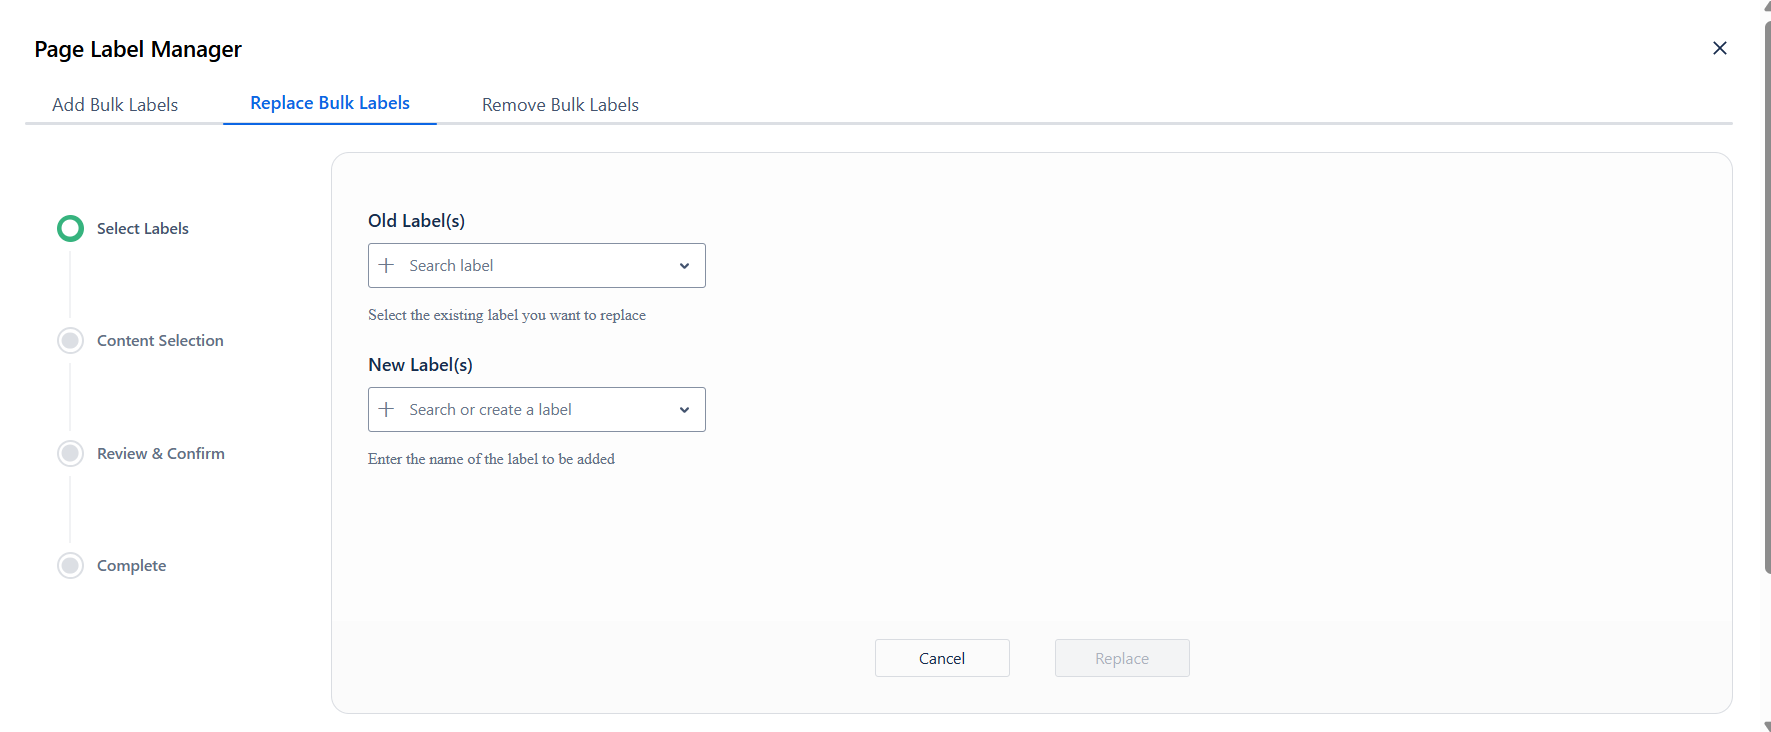
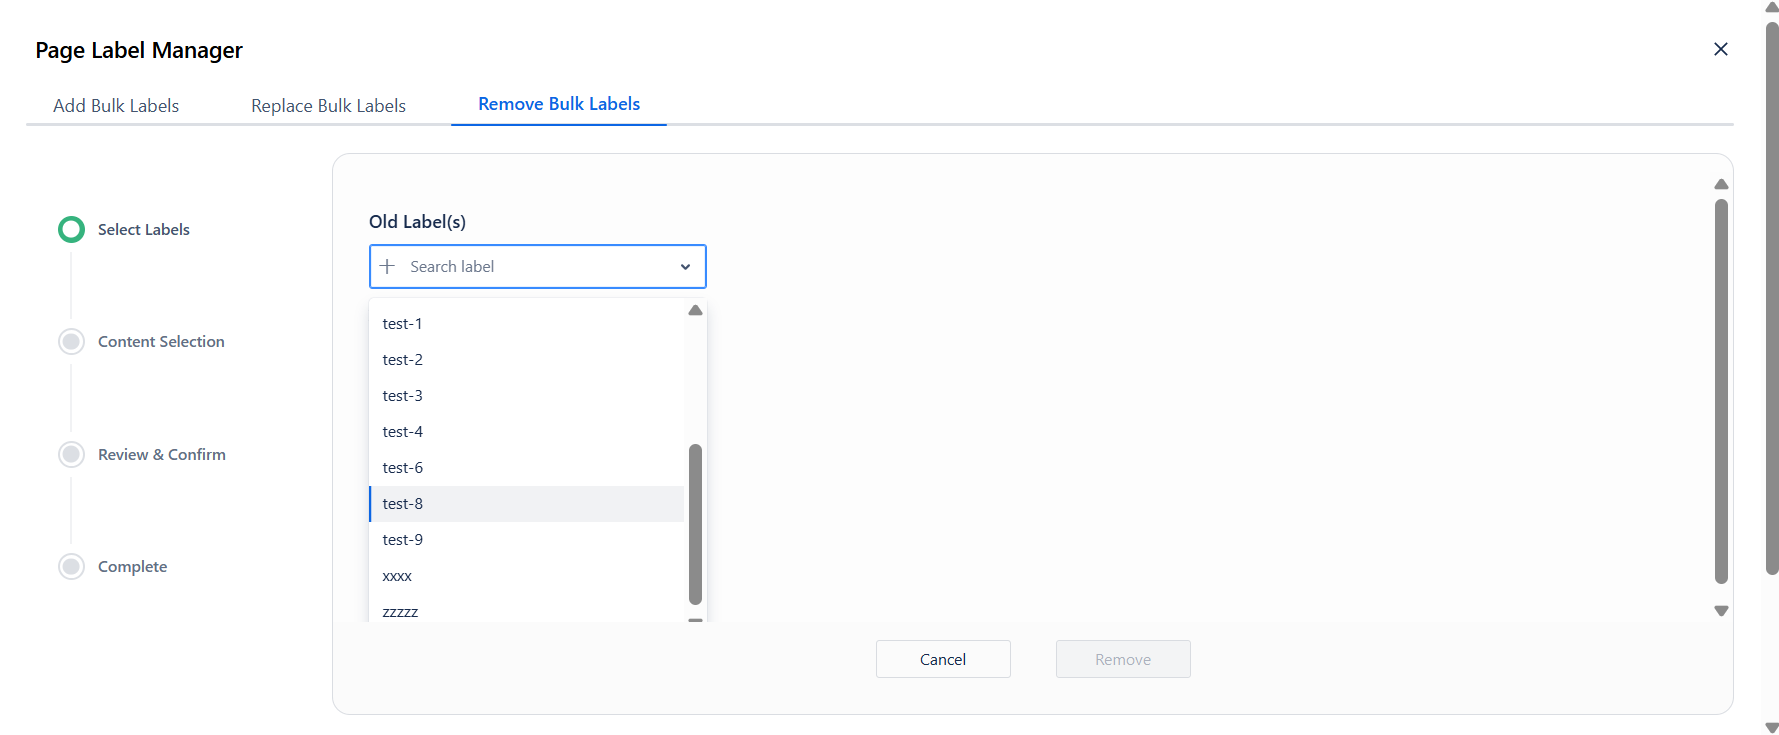
After you choose an operation, provide the labels the app needs to complete that action. The available fields change depending on the operation, so enter the values carefully before moving on.
|
Operation |
Labels to enter |
|---|---|
|
Add |
Enter the label or labels that should be added to the selected content. |
|
Replace |
Select the old label that should be removed, then enter the new label that should replace it. |
|
Remove |
Enter the label or labels that should be removed from the selected content. |
🏷️ Tips for selecting labels
-
Start typing a label name to see suggestions. If you spot the right one, just pick it.
-
You can also create a new label by typing a name that doesn’t exist yet.
-
If the item already has the label you’re adding, the app won’t add it again. It just skips it.
Labels don’t allow spaces and are all lowercase. If you type a space, it changes to a hyphen, so your label can have multiple words, like this: this-is-a-label. Capitals will switch to lowercase automatically. You can add several labels at once by pressing Enter or Return.
6.3 Select target content
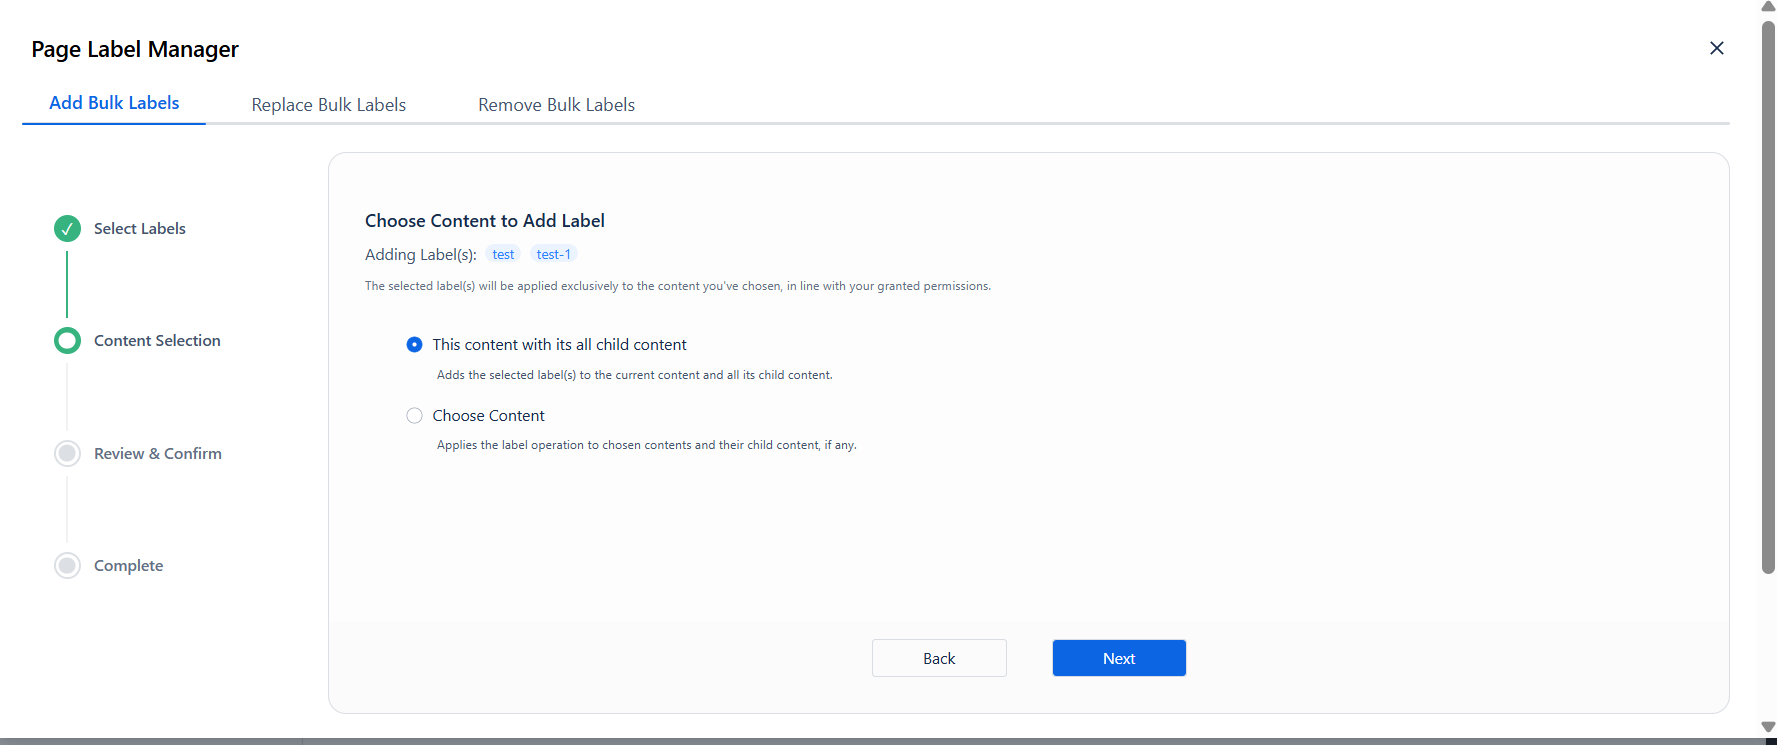
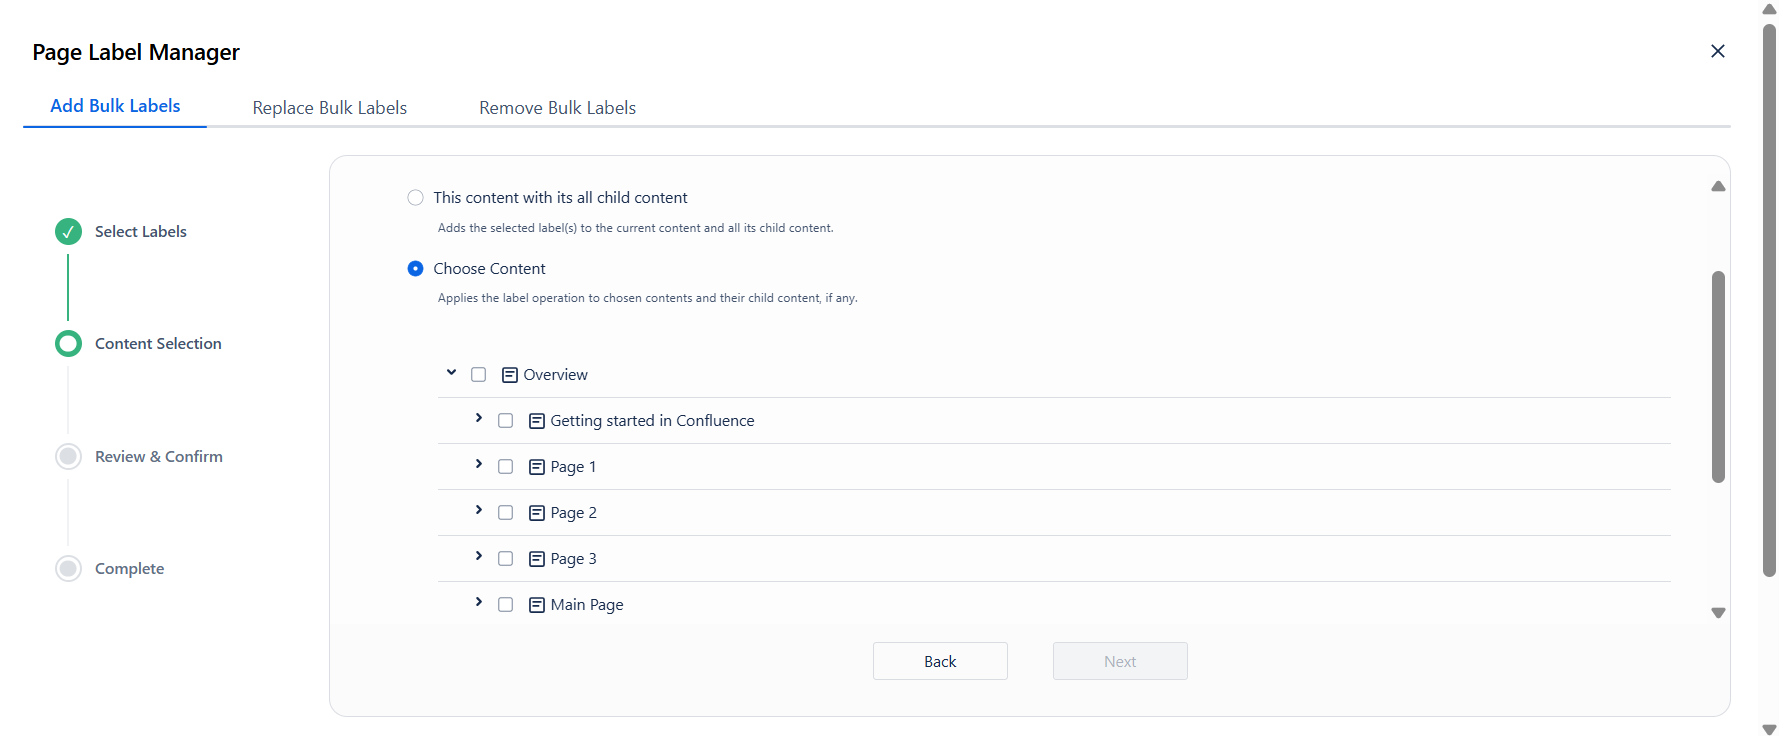
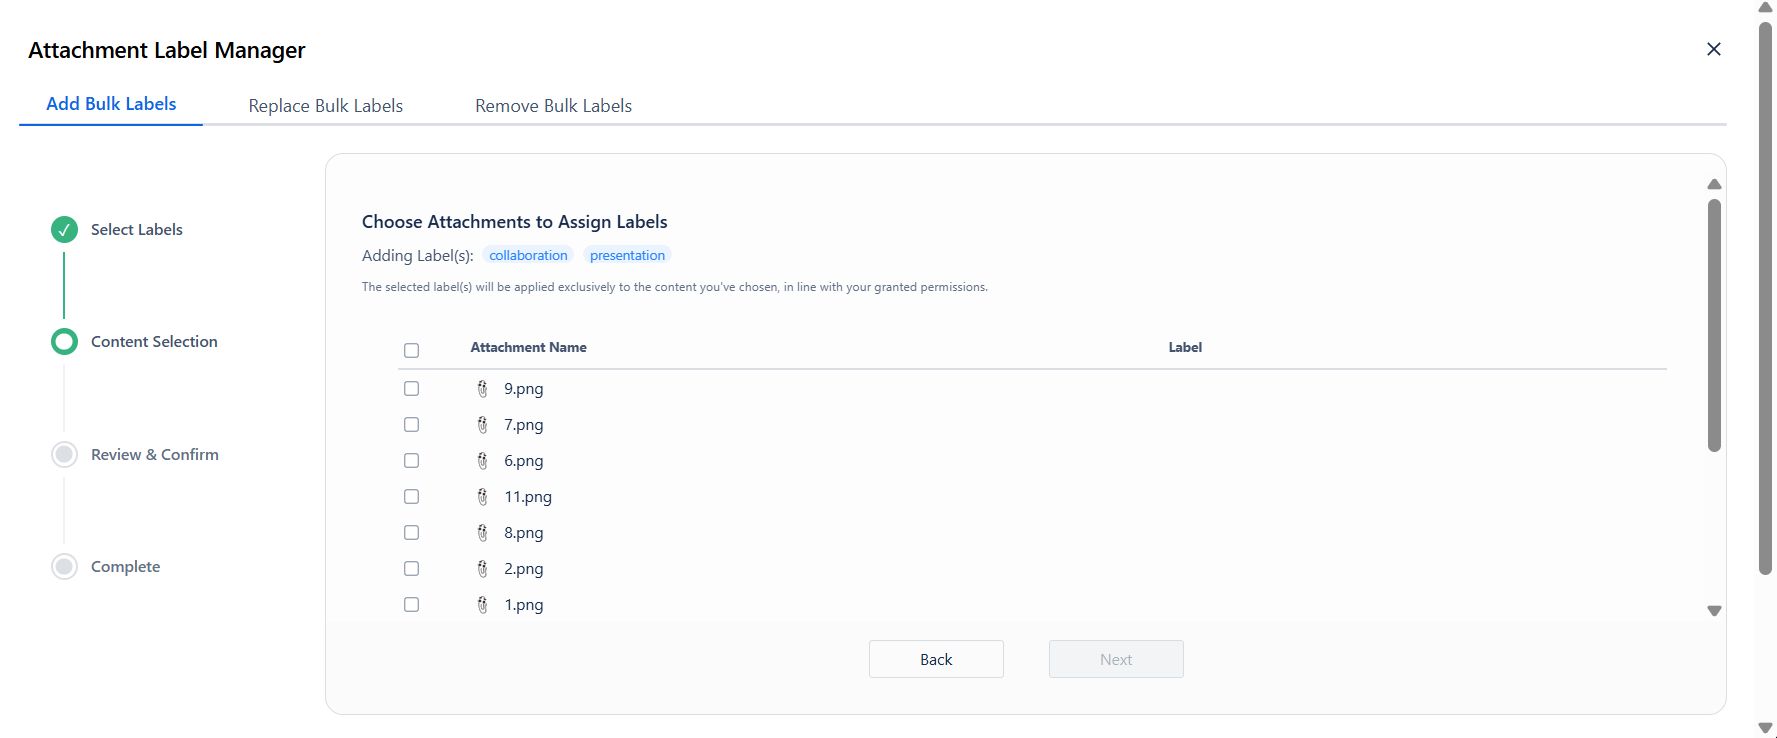
Next, choose the content to receive the label update. The workflow is the same for all operations; the selection area depends on the content type.
-
Page Label Manager: Use the page tree to select the pages, live docs or blog posts to update.
-
Attachment Label Manager: Use the attachment list to select the files to update.
6.4 Review and confirm
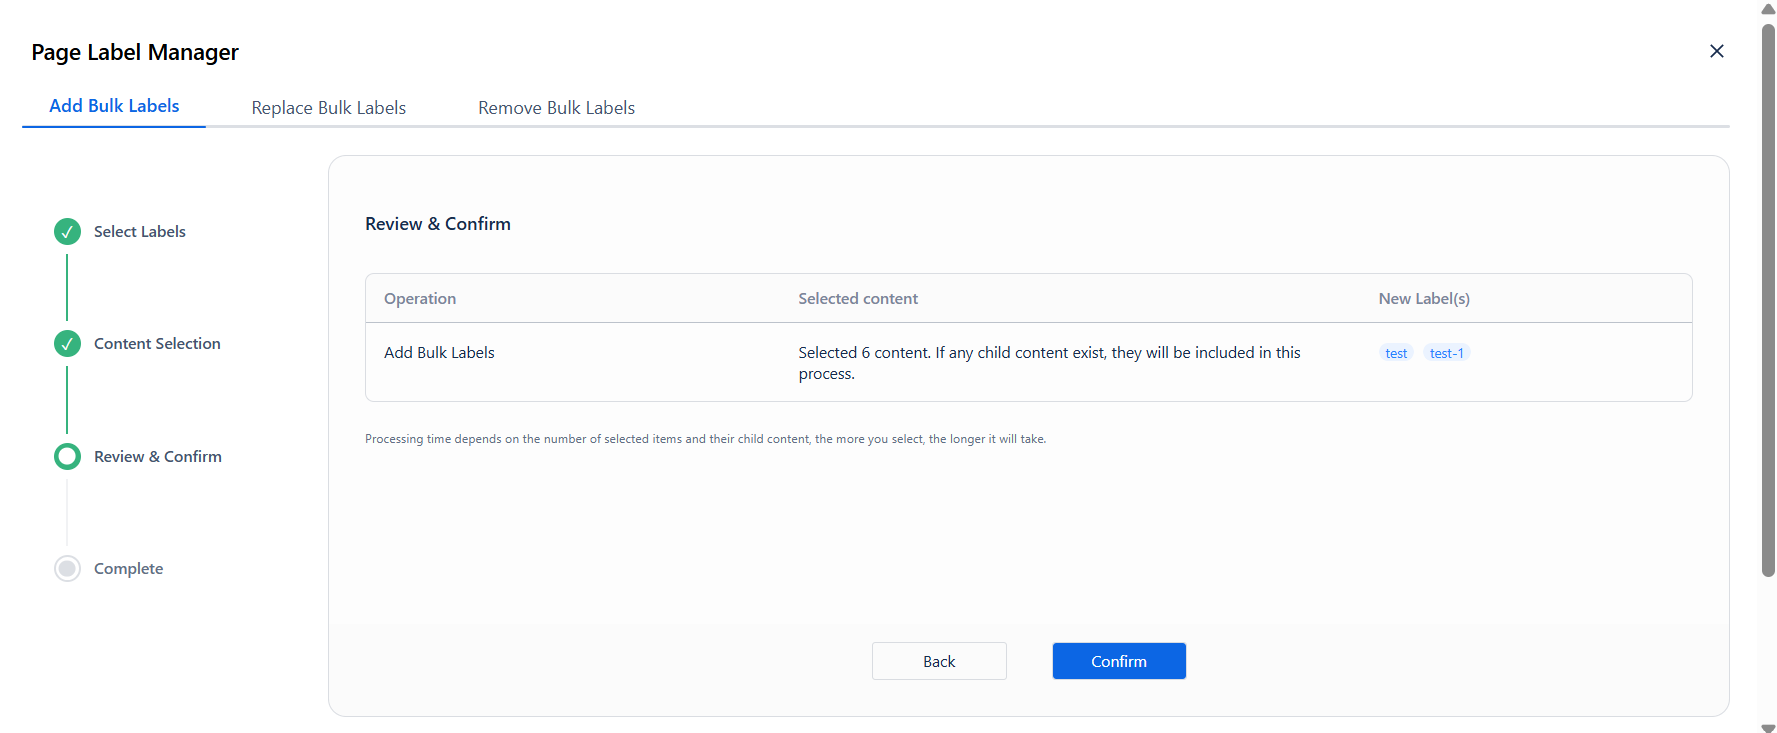
A summary table shows the full scope of the operation before anything is changed.
|
Column |
What it shows |
|---|---|
|
Operation |
Add/Replace/Remove Bulk Labels |
|
Selected content |
Number of pages or attachments in scope, including any child pages |
|
Label(s) |
New or Old label(s) varying according to the operation |
If anything looks wrong, click Back to adjust your selection. When ready, click Confirm.
6.5 Start the operation
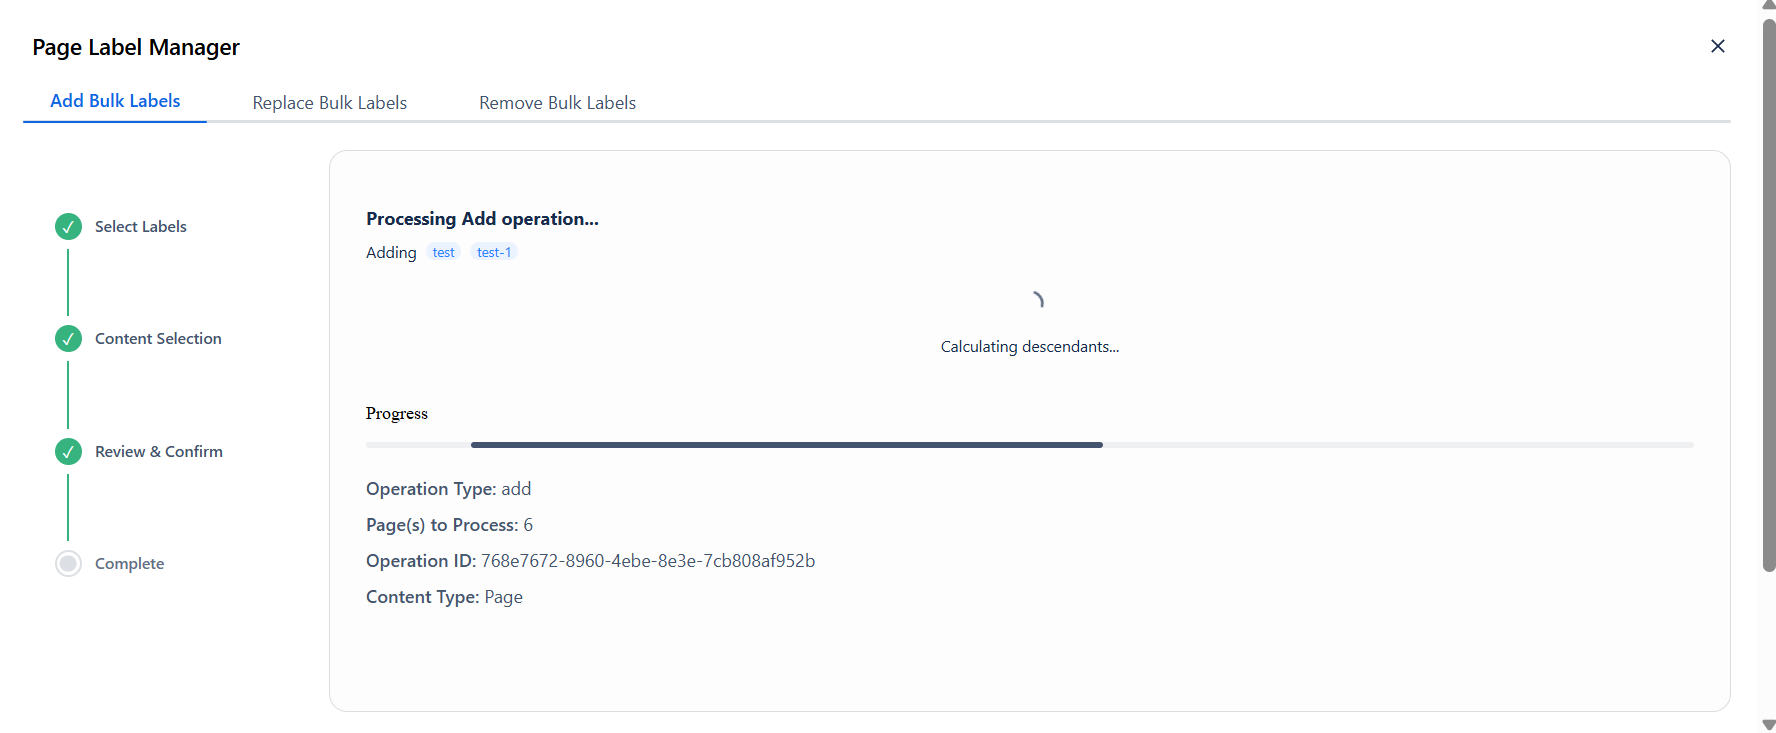
After confirming, a progress bar appears. The panel shows live details while the operation runs:
-
Operation Type: add / replace / remove
-
Page(s) to process: total pages / attachments being updated
-
Operation ID: unique reference for this job
-
Content type: page / attachment
If the app shows live progress or item-by-item updates, wait for the process to complete before leaving the page or repeating the action.
6.6 Complete / Processing Results
Once complete, the results table appears:
|
Metric |
Description |
|---|---|
|
Total Processed |
Total pages evaluated |
|
Successful |
Pages updated without error |
|
Skipped |
Contents skipped due to unsupported content type |
|
Error |
Pages that could not be updated |
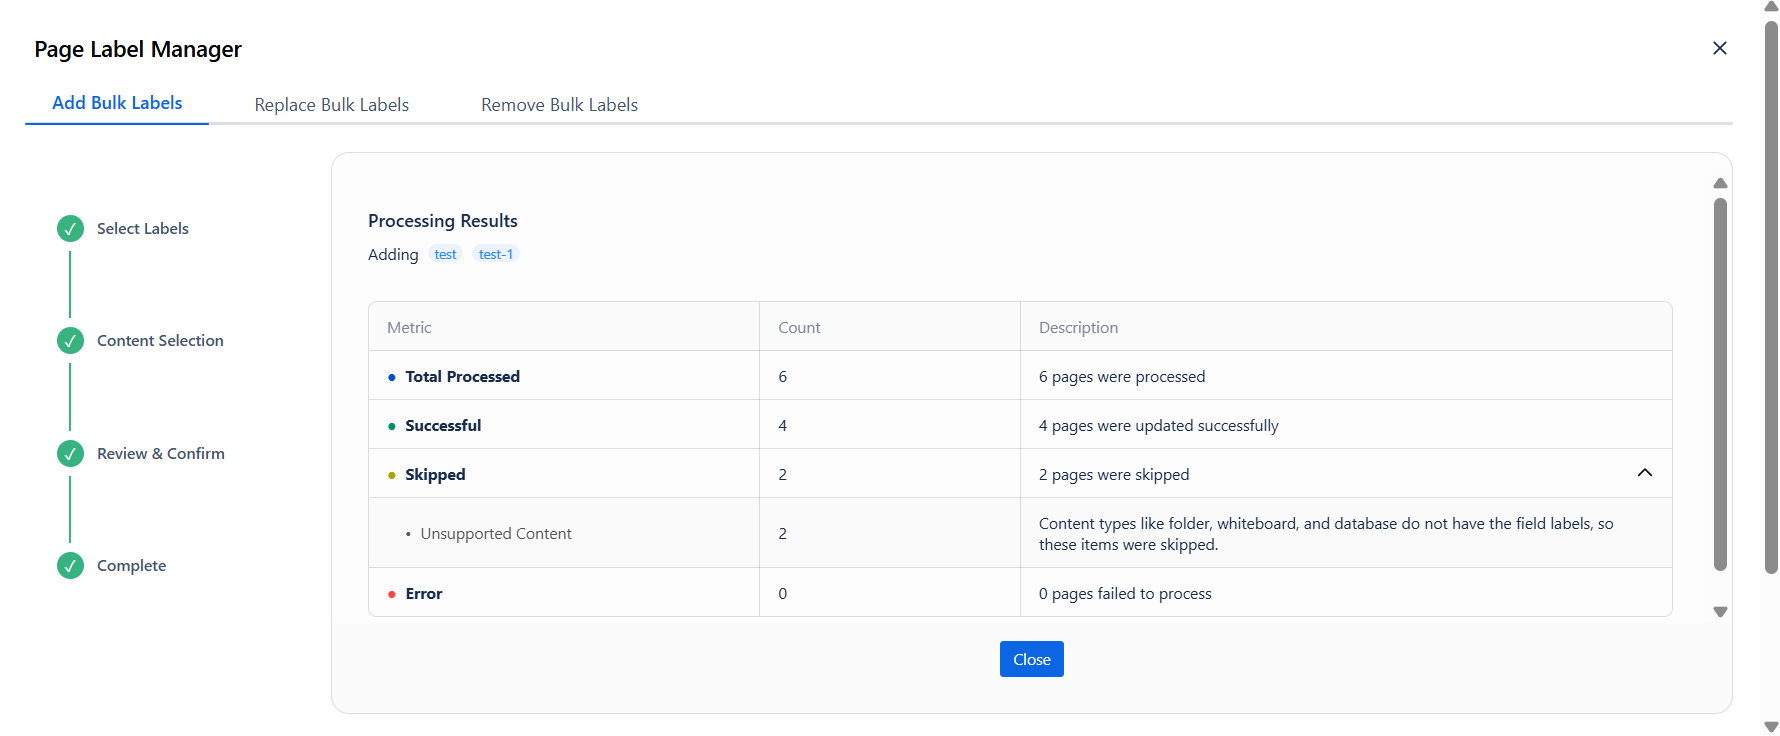
Click Close to dismiss the dialog.
There is no “Undo” feature in the application; actions cannot be reversed. You can correct mistakes using the following methods.
-
Reverse an Add operation by using Remove.
-
Reverse a Replace operation by replacing the new label with the previous label.
-
Reverse a Remove operation by adding the removed label again.
6.7 Example scenarios
The following short examples show typical use cases for each operation.
|
Operation |
Example |
|---|---|
|
Add |
Add |
|
Replace |
Replace |
|
Remove |
Remove |
Following this shared flow helps users perform bulk label updates consistently, whether they are working with pages, live docs, blog posts, or attachments.