
A Project in Financials for Jira represents a financial entity you want to track. Each project has its own revenue plan, cost plan, actuals and settings. Create as many projects as you need - they appear in the Projects panel.
The Scope field determines which Jira work items link to a project's financial data. Choose one of three options: a Jira project, a saved filter, or a custom JQL query. Only work items that match the selected scope are available when linking actuals and plans to Jira issues.
3.1 Creating a project
Permission required: Financials for Jira Create New Project (global permission)
-
Open Financials for Jira from the left sidebar under Apps.
-
In the Projects panel, click the Create Project button.
-
Fill in the required fields.
-
Click Create.
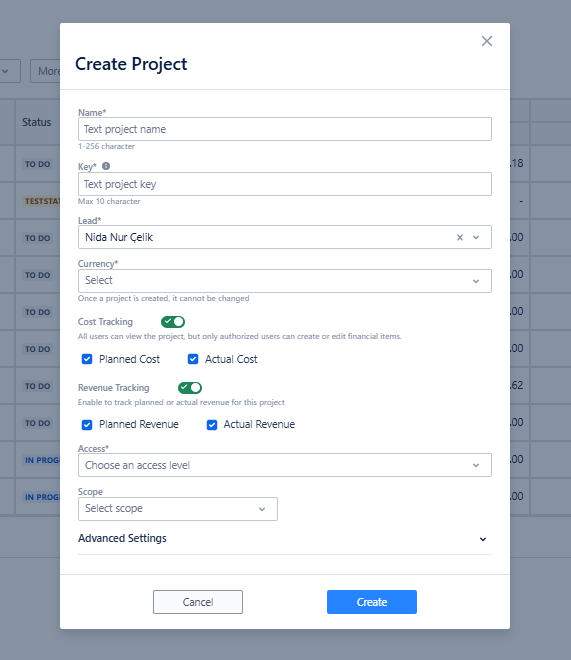
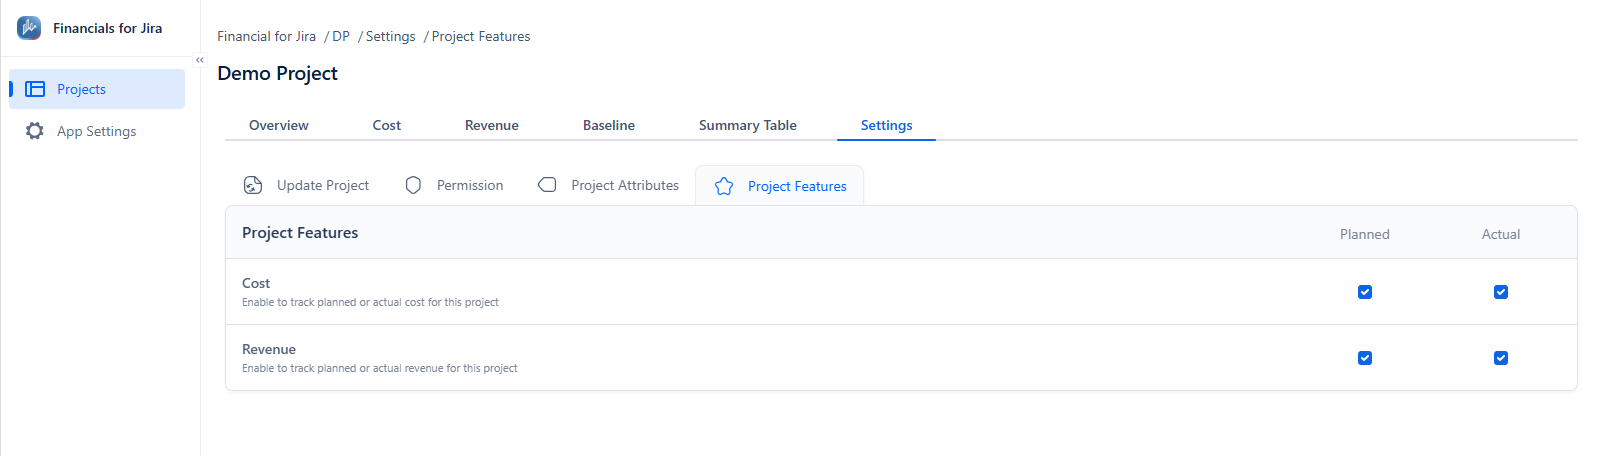
You can track only costs or only revenues in your project. You can also track only planned or only actual financial data. Use Toggle and Checkbox to customise these project settings.
Project Currency cannot be changed after project creation.
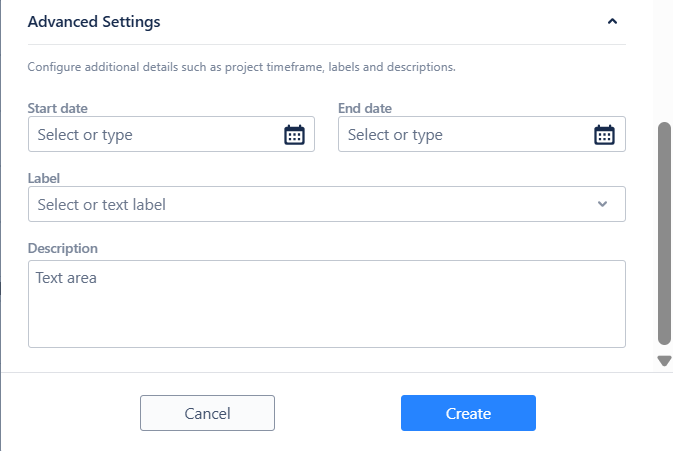
Use Advanced details to configure project timeframe, labels and descriptions.
3.2 Updating a project
Permission required: Project Admin permission for the specific project.
-
Go to the Projects panel and click on the project name to open it.
-
Click Settings in the top menu.
-
Make the necessary changes to the fields you want to update.
-
Click Update to save your changes.
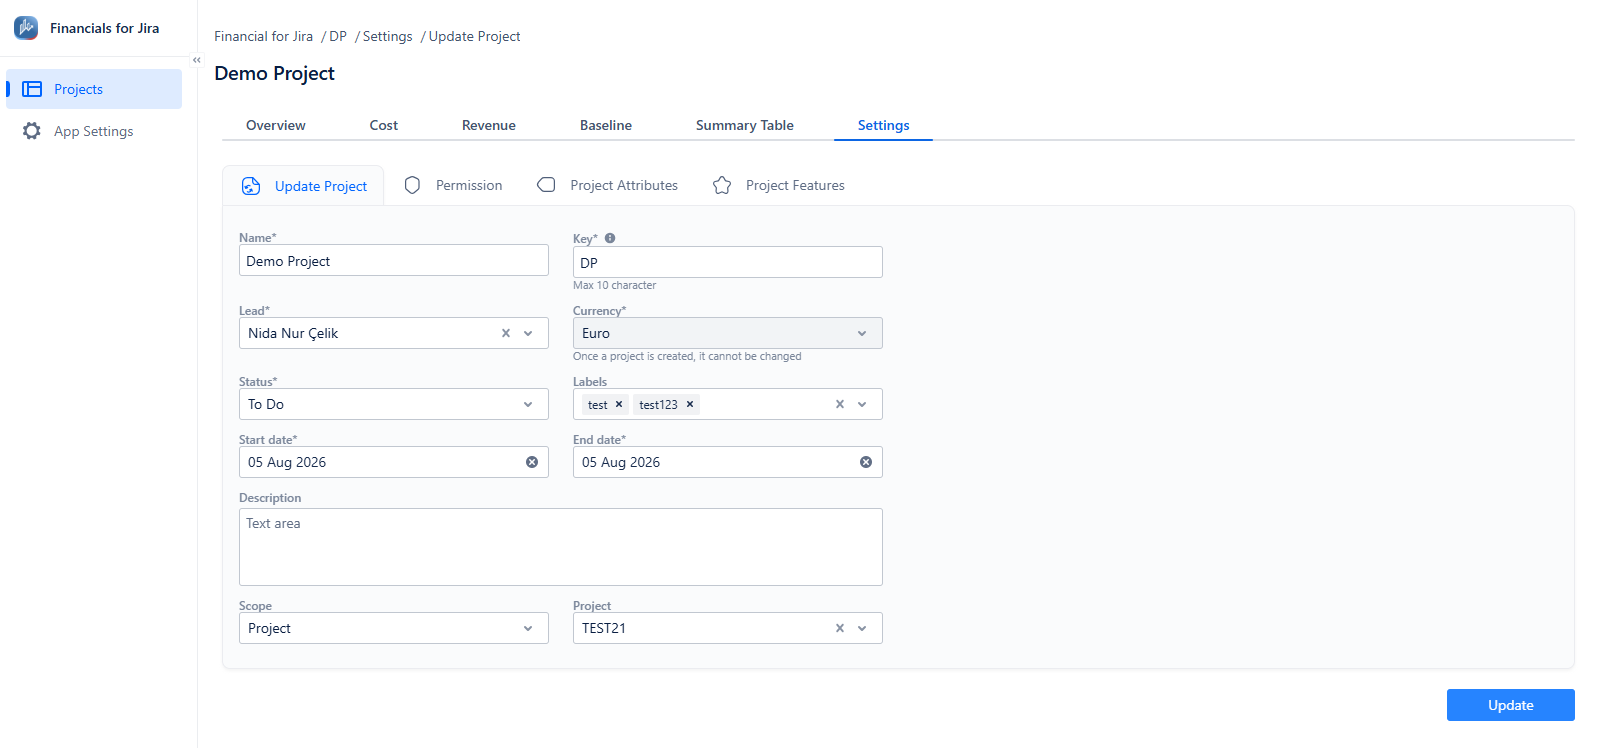
There are 4 project setting tabs:
-
Update Project: Modify basic project information such as name, key, lead, status, timeline dates, labels and scope.
-
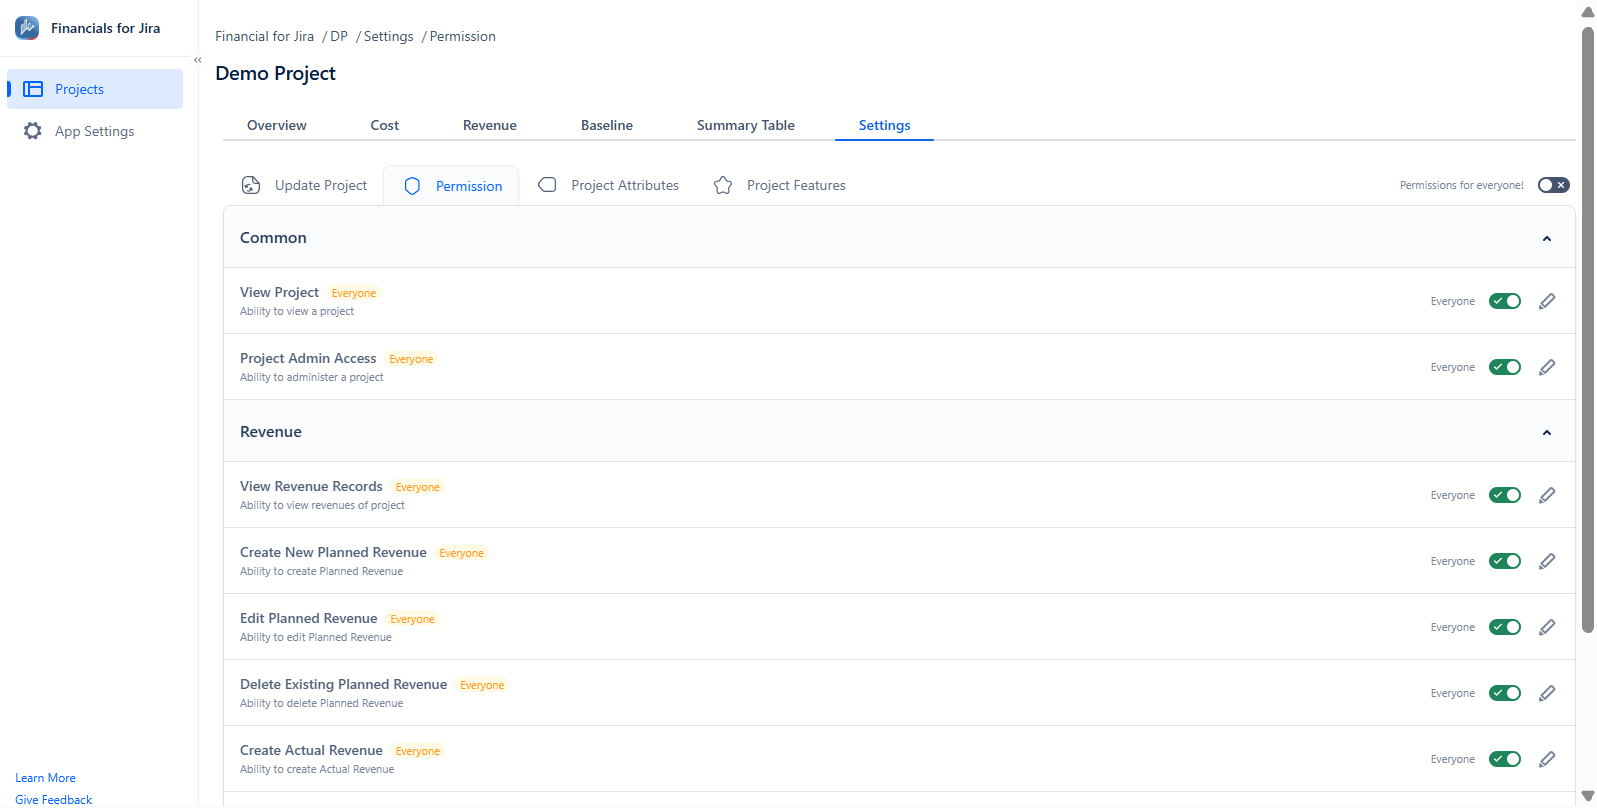
Permission: Allows management of access rights for viewing, creating, editing or deleting project details and financial records.
-
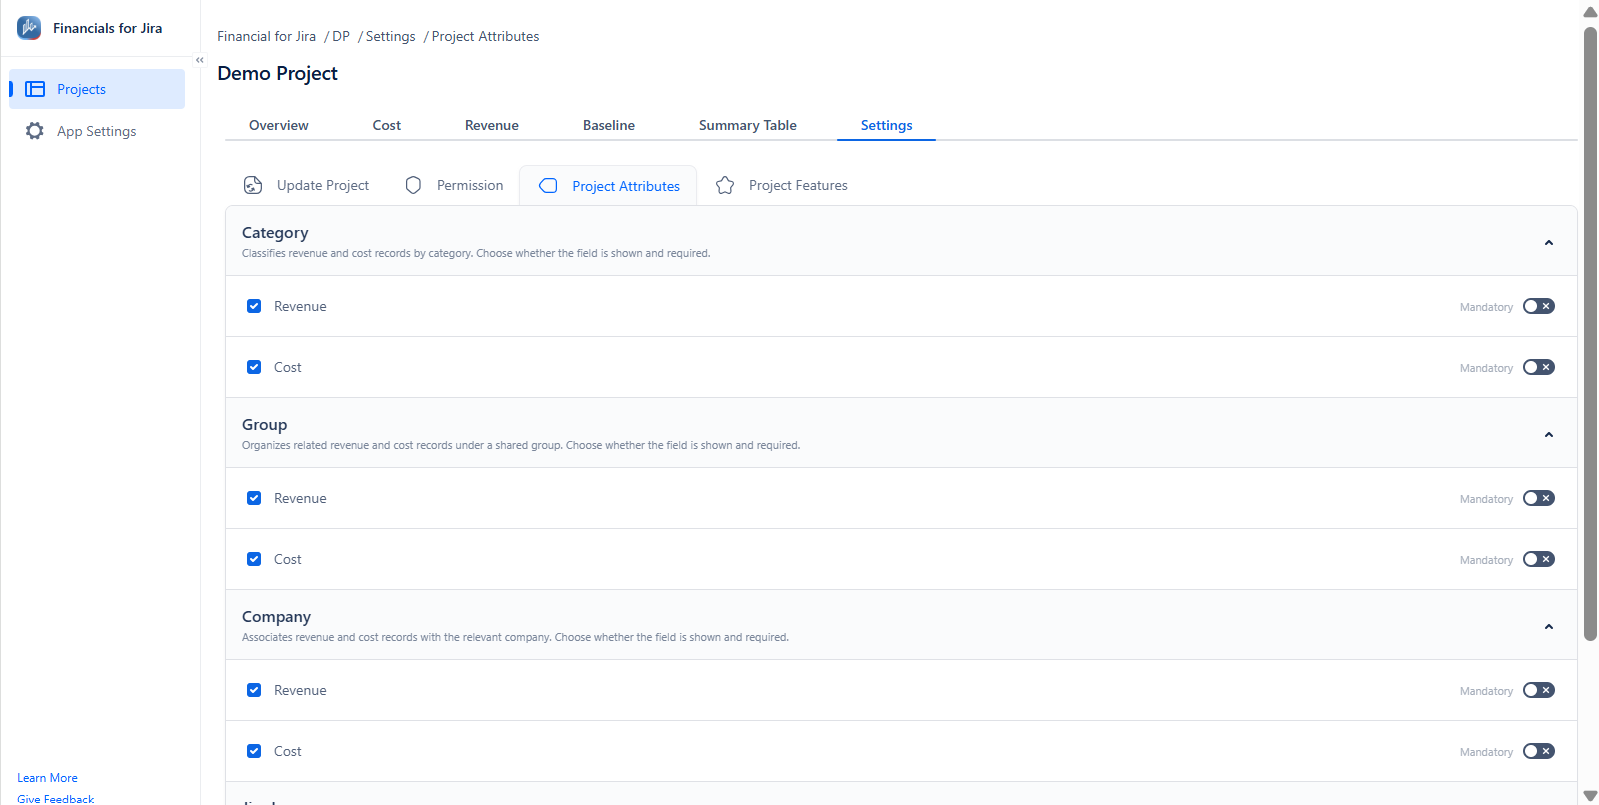
Project Attributes: Configure which custom fields - such as Category, Group, or Company - appear and are required for cost and revenue entries.
-
Project Features: Enable or disable planned and actual cost and revenue tracking for the project.
3.3 Deleting a project
Permission required: Financials for Jira Administrator or Project Leader of the project
-
Locate the project to delete in the main Projects table.
-
Click the three dots icon (
...) at the far right of the project row. -
Select Delete from the dropdown menu.
-
In the confirmation dialog, confirm to proceed.
Deleting a project is permanent. All associated financial data, costs, and revenues linked to this project will be removed and cannot be recovered.