
1. Update Project Configure
1.1. Prerequisites
A user with administrator permissions, changes the Project Configure.
1.2. How to
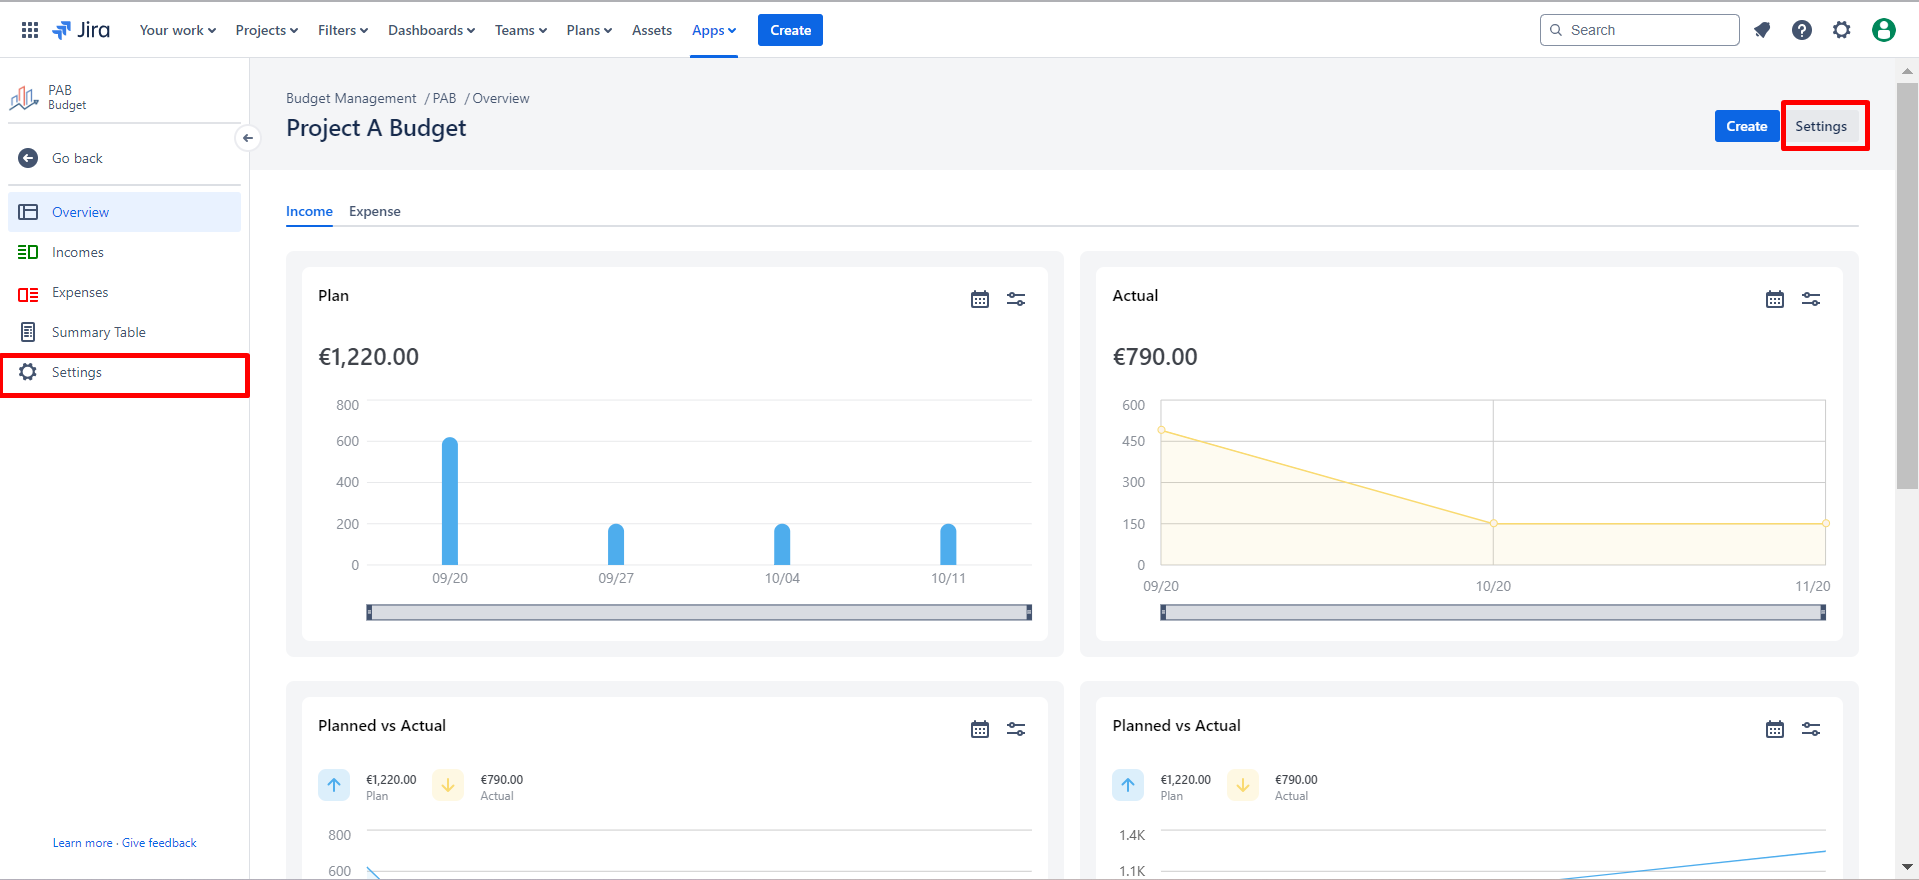
To grant Project Configure, navigate to the Project panel and follow these steps:
1.2.1. Select the specific Project to which you want to grant permissions.
1.2.2. Click on the :cog: settings icon located on the left side of the Project panel; this action will redirect you to the settings panel.
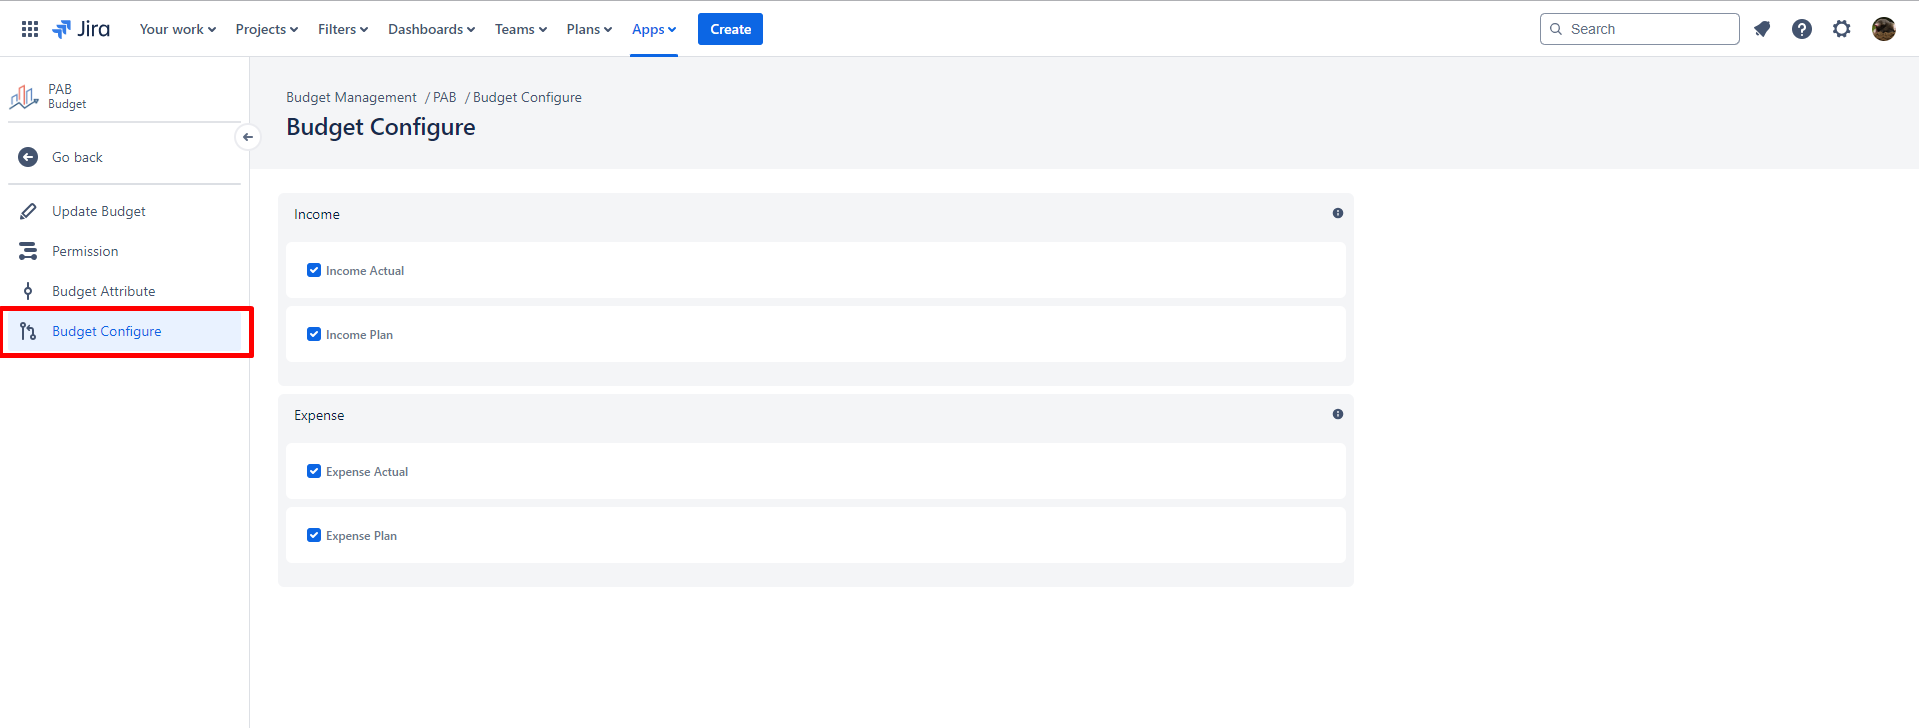
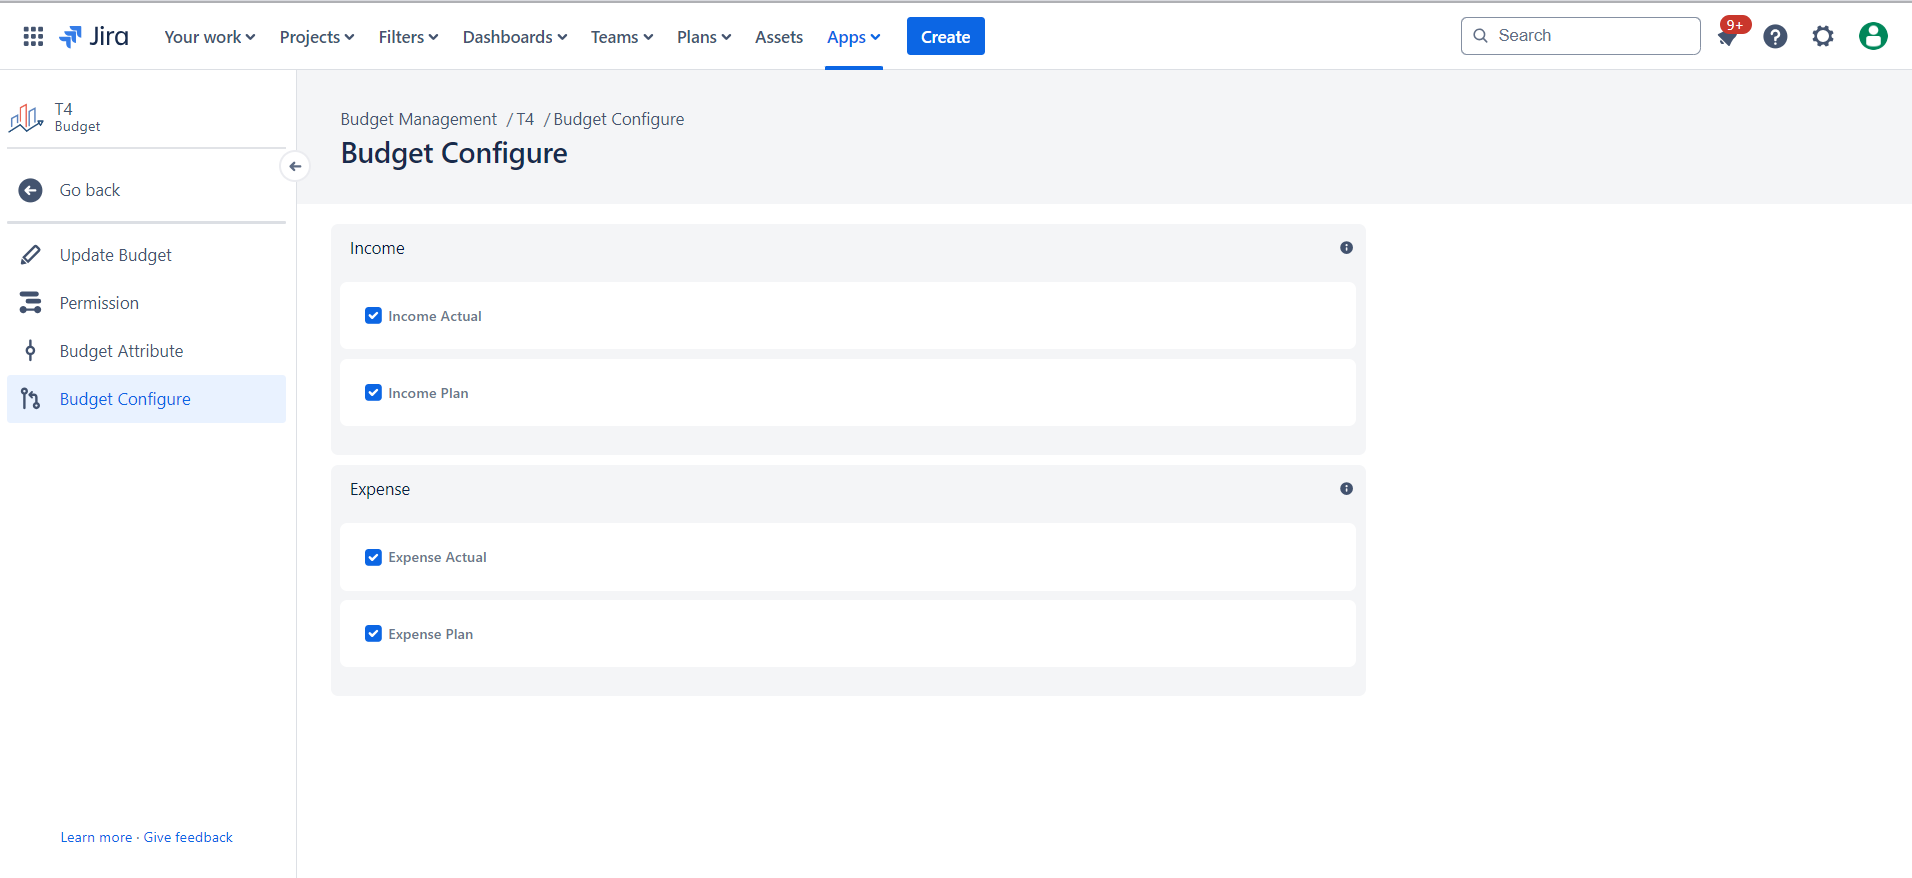
1.2.3. Within the settings panel, click on "Project Configure" from the left-hand side menu, which will open the Project Configure panel.
|

|
|---|
1.2.4. In the Project Configure panel, click the boxes on the left side of fields to specify which fields appear and selectable on the create screen.
|
|
|---|
1.3. Purpose
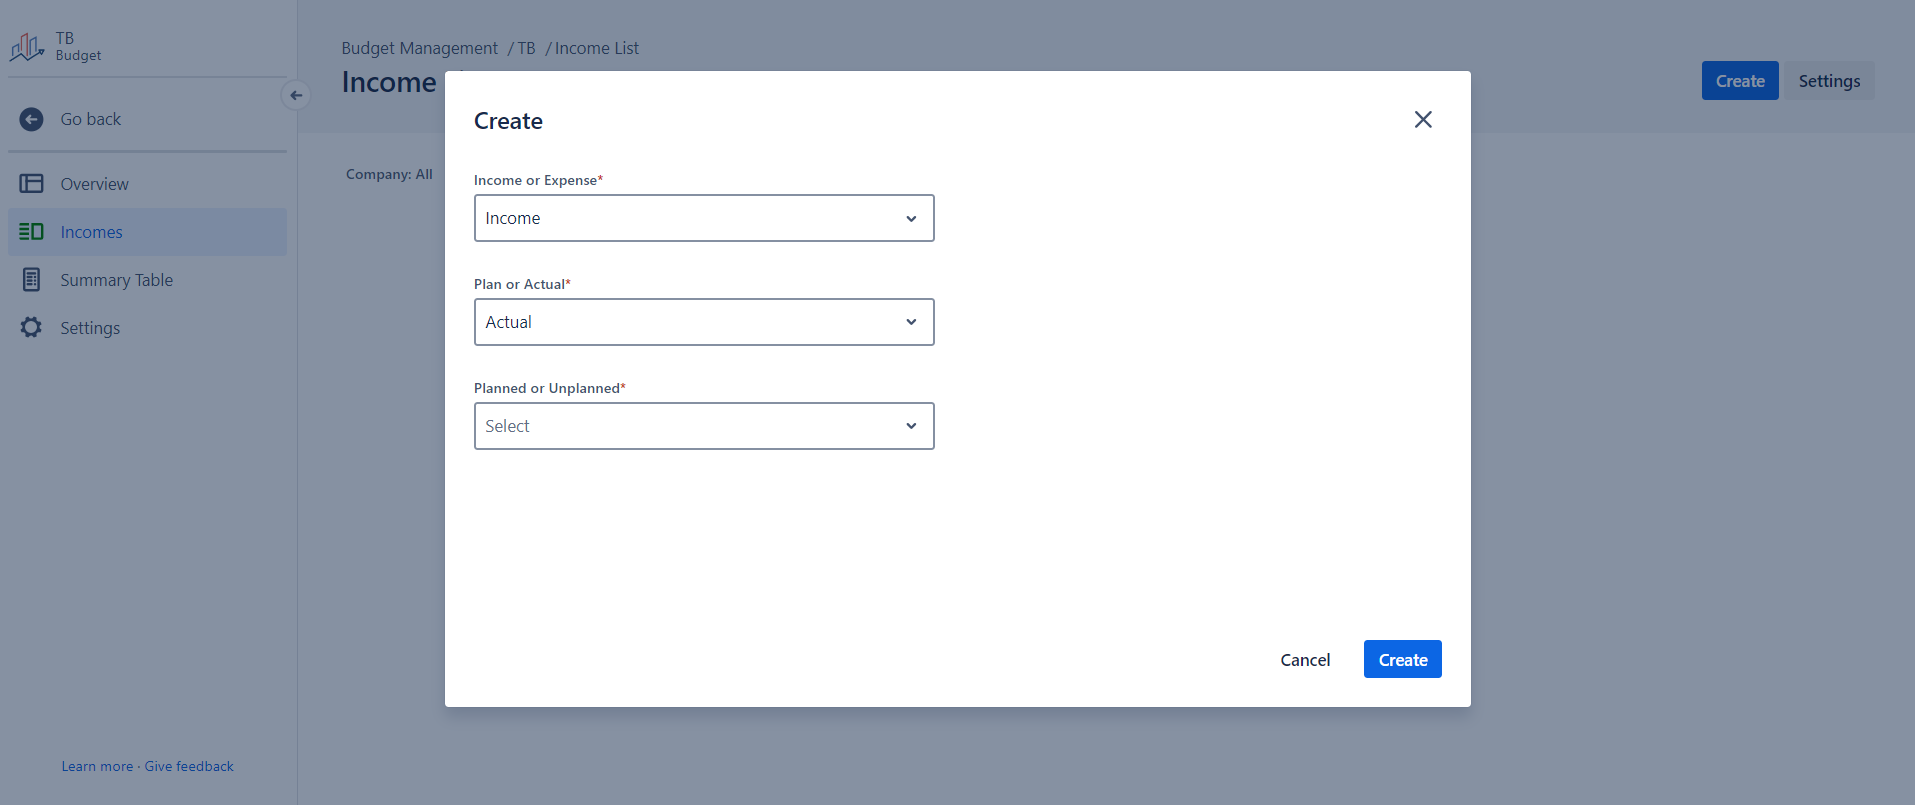
The selectable fields on the create screen dynamically adjust based on the user's initial selections. For instance, when "Income Actual" is chosen, the corresponding fields for "Income" and "Actual" will be pre-selected and displayed by default on the create screen.
|
In case: 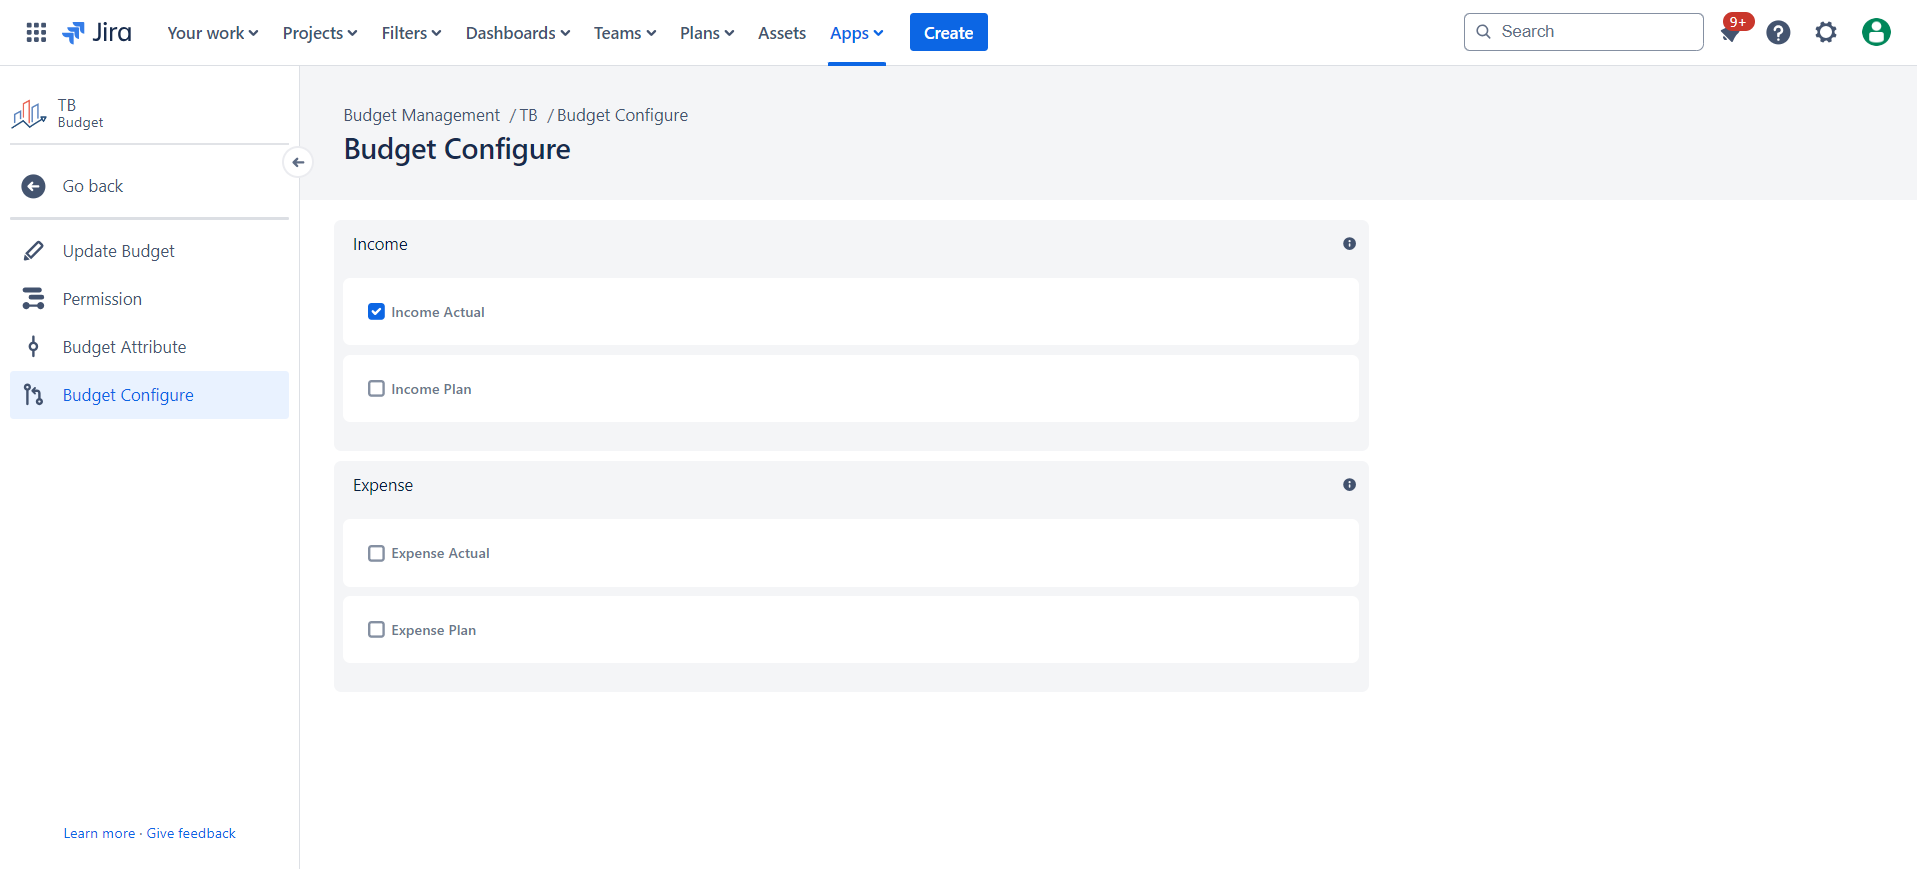
|
|---|
By following these steps, you can easily access and configure Project Configure for the desired Project in the Project panel.
1.4. Constraints
When it comes to granting permissions for a Project in the Project panel, consider the following constraints:
1.3.1. Ensure that you have the necessary administrative privileges; lacking these permissions will hinder your ability to grant access.
1.5. Issues that may arise
While attempting to configure Project Configure for a Project, be aware of potential issues that might arise:
1.4.1. If you encounter difficulties in accessing the Project Configure panel or making changes, ensure that your user account has the appropriate privileges within the Project system.